So you need a banner. It sounds simple enough, but getting it right means turning your message into a big, bold statement that grabs attention for all the right reasons. The secret isn't just a great design; it's about picking the right materials and format for the job. Get this part right, and your investment will pay for itself in visibility and impact.
Your Quick Reference Guide to Banner Printing
Figuring out which banner you need can feel overwhelming with all the options out there. This section is designed to cut through the noise and get you to the right solution, fast. Are you gearing up for a windy outdoor festival, a polished corporate trade show, or a simple in-store sale? Each scenario demands a different approach.
To make things even easier, we've put together a decision tree to walk you through the process. Just follow the path based on where your banner will live, its main purpose, and your budget.
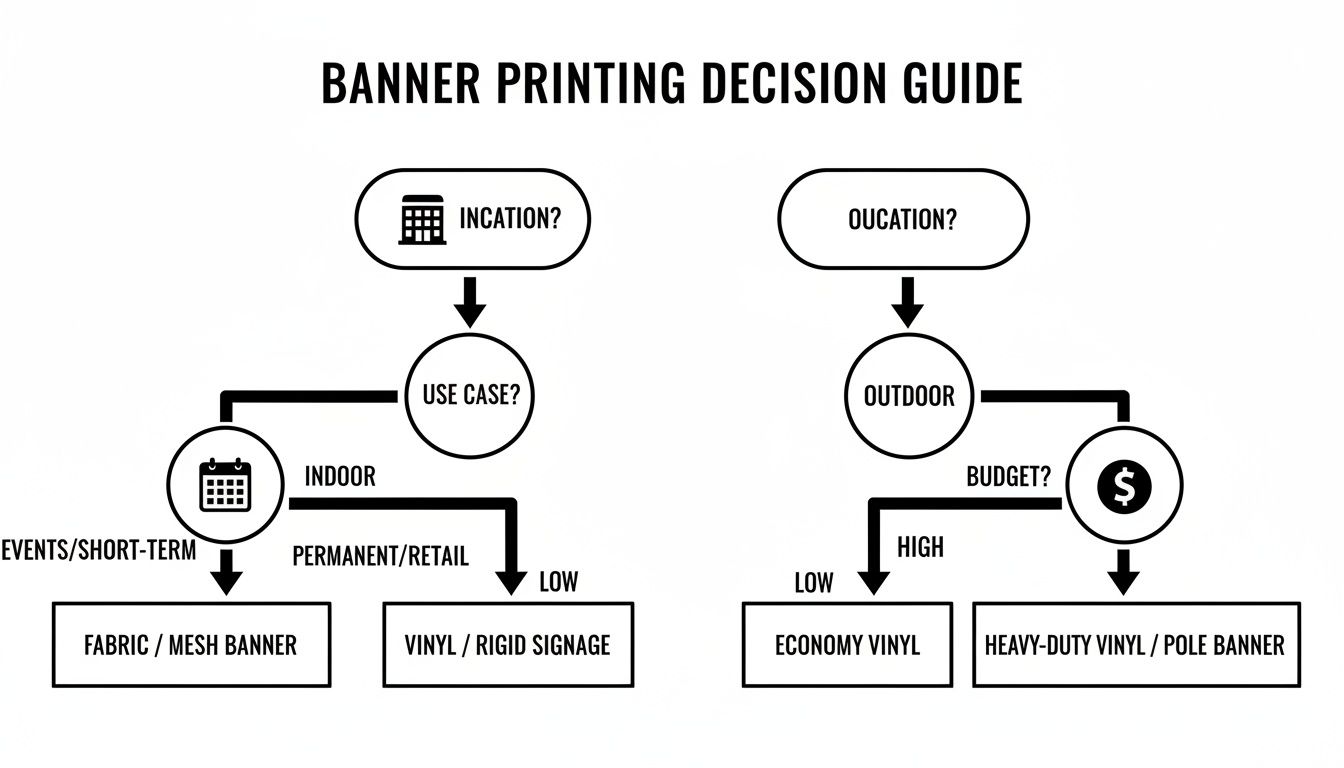
As you can see, factors like whether the banner is indoors or battling the elements directly point you toward specific materials and types. Think of this flowchart as your starting point. It gives you the fundamentals so you can confidently explore the more detailed sections of this guide.
For an even faster overview, this table breaks down the most common pairings we see every day.
Matching Banner Types to Your Use Case
This quick lookup table will help you match the most popular banner types with their best-suited applications, materials, and standout features. It's a great way to quickly narrow down your options.
| Banner Type | Primary Use Case | Recommended Material | Key Feature |
|---|
| Standard Vinyl | Indoor/Outdoor Events | 13oz Scrim Vinyl | Versatile and cost-effective |
| Mesh Banner | Fences, Windy Locations | 8oz Coated Mesh | Allows wind to pass through |
| Fabric Banner | Photo Backdrops, Retail | Polyester Fabric | Glare-free, premium finish |
| Retractable Banner | Trade Shows, Lobbies | Smooth Blockout Vinyl | Portable and easy setup |
This table should give you a solid idea of where to begin. As you read on, we'll dive deeper into what makes each of these options the right choice for specific situations.
Selecting the Perfect Banner Type
Choosing the right banner format is the first, and arguably most important, decision you'll make. It’s not just about what looks good; it’s about what works. The right choice will affect your banner's visibility, how long it lasts, and the overall message it sends. Let's break down the four main players in the banner world.
Think of standard vinyl banners as the reliable all-rounders of the sign industry. They're made from a tough, weather-resistant PVC material, which makes them a fantastic, budget-friendly option for everything from grand opening announcements to festival signage. Their smooth finish really makes colors pop, ensuring your graphics grab attention.
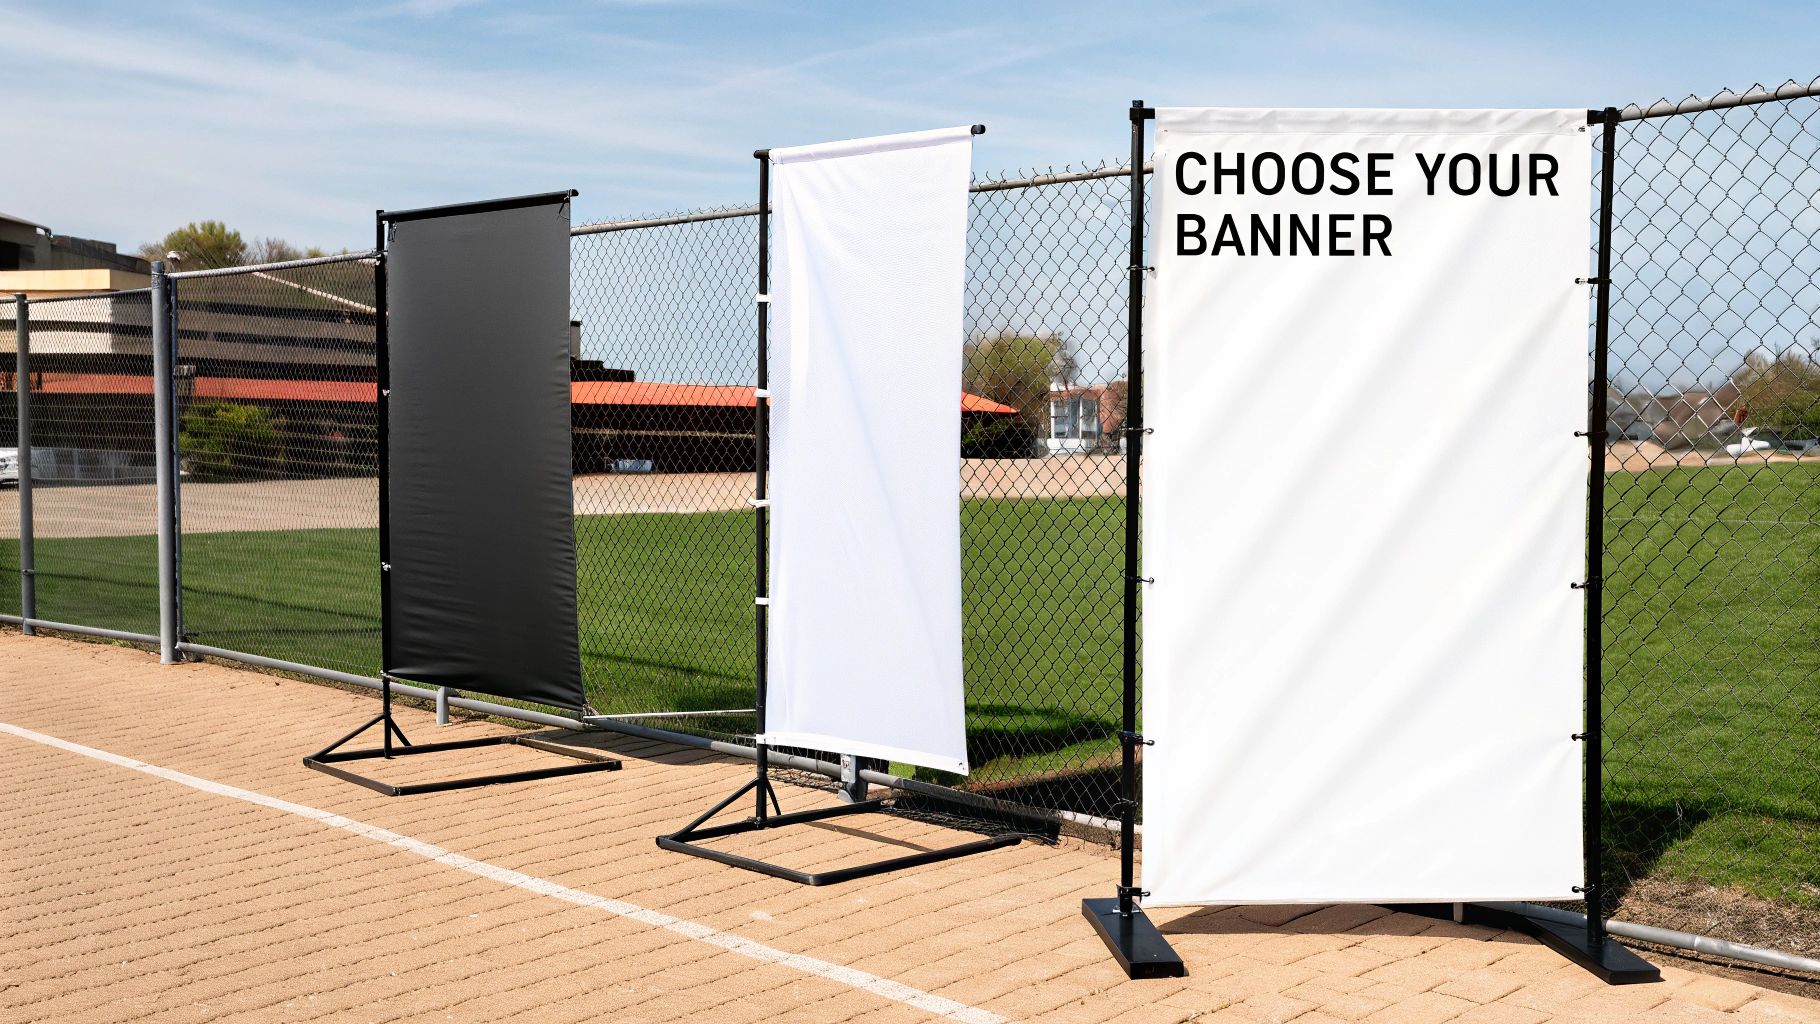
Banners for Specialized Environments
What if you're dealing with a windy location? That's where mesh banners shine. We make these with tiny perforations across the surface, which lets the wind pass right through instead of catching the banner like a sail. This simple feature prevents tearing and takes the stress off the mounting hardware, making them perfect for fences, scaffolding, and breezy storefronts. From a distance, you won't even notice the holes, but they make a world of difference.
For situations that call for a more sophisticated, upscale look, you'll want to go with fabric banners.
Made from polyester, fabric banners have a soft, matte finish that eliminates glare. This is a huge advantage for indoor settings like trade show backdrops or press conference backdrops where bright lighting and photography are a given. The non-reflective surface guarantees your message stays clear and professional.
Finally, if you need something you can set up in a flash, retractable banners are the answer. They come ready to go in a portable stand, so you can pull them up and have a professional display in seconds. They are an absolute staple for trade shows, lobbies, and pop-up events where you need a self-standing sign that's easy to carry and store. Understanding these key differences is the first step to making sure you get the perfect banner for the job.
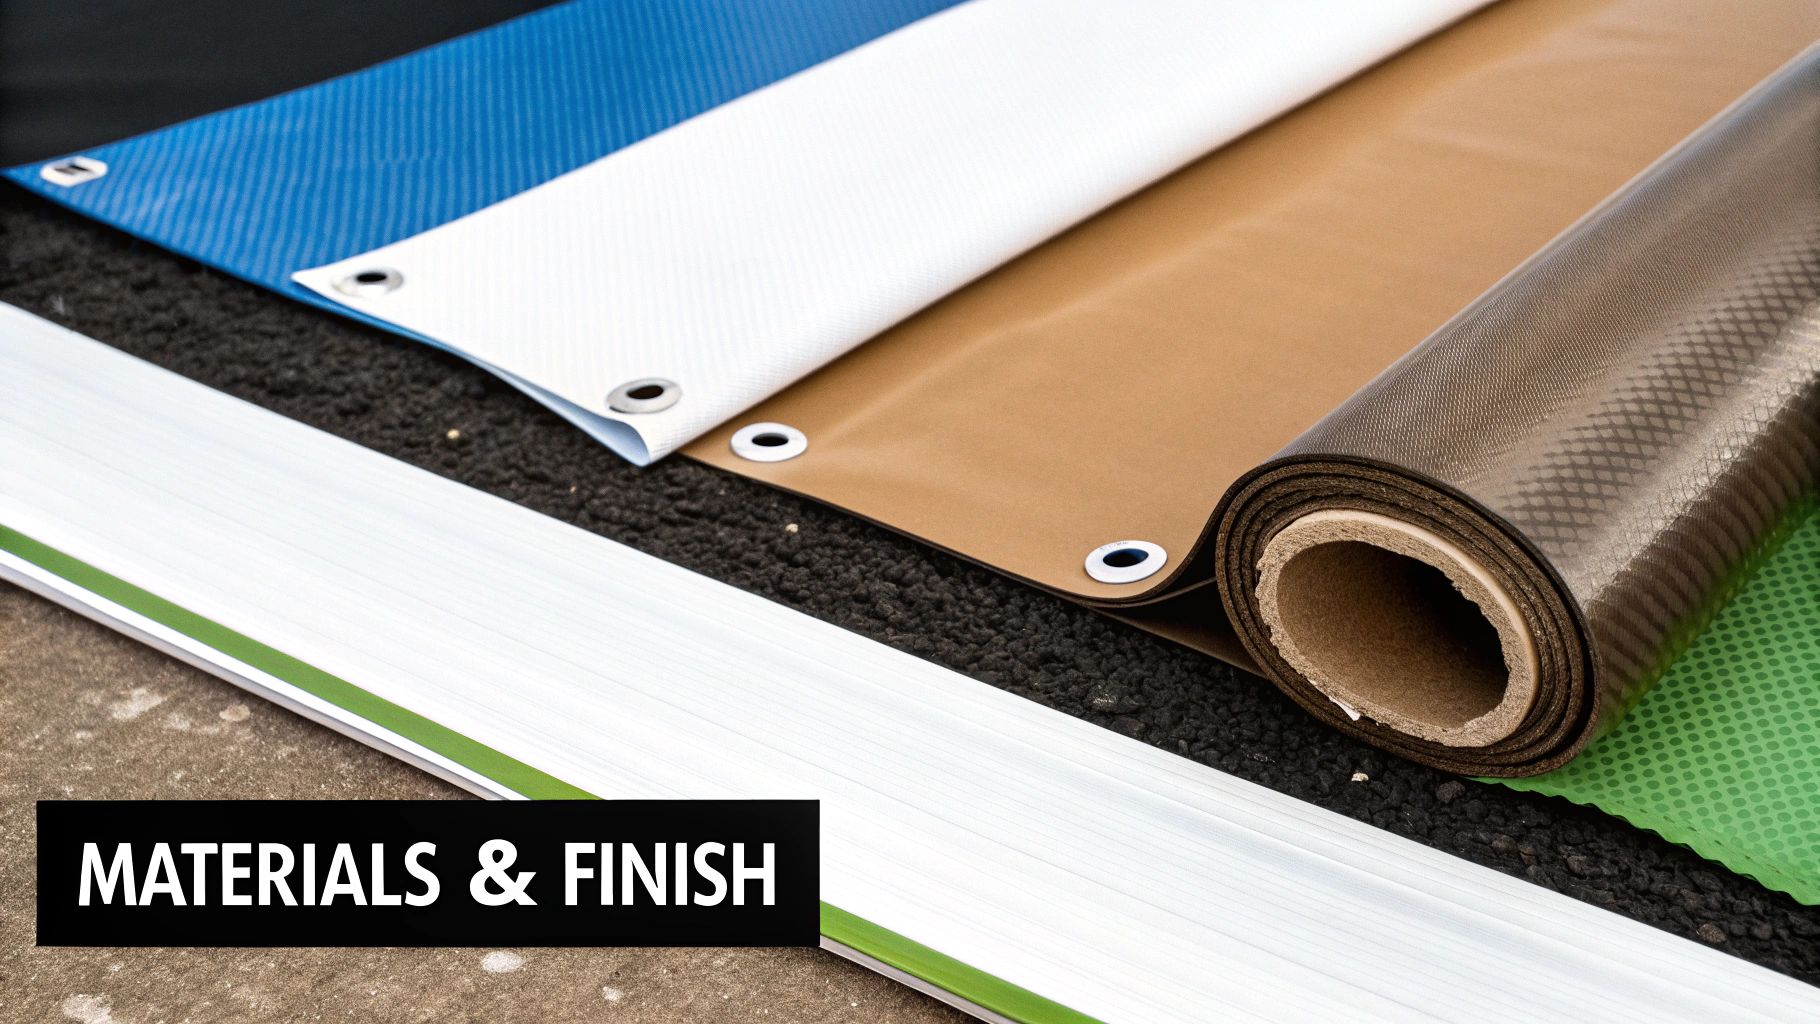
Understanding Banner Materials and Finishes
The secret to a banner that lasts and looks great isn't just in the design—it’s in the material it's printed on. Picking the right material and finish is a critical step that dictates everything from weather resistance to how vibrant your colors look, ensuring your investment pays off.
The go-to material for most projects is 13oz scrim vinyl. Think of it as the reliable workhorse of the banner world. It's a cost-effective vinyl with a polyester mesh sandwiched inside, which gives it impressive tear resistance. This makes it a fantastic all-rounder for both indoor displays and short-term outdoor use, like for a seasonal sale or an annual community event.
Heavy-Duty and Specialty Materials
When you need something tougher, 18oz blockout vinyl is the answer. This material is thicker, stronger, and completely opaque thanks to a special blockout layer inside. That means you can print on both sides without any distracting "show-through" from the design on the other side. It’s perfect for long-term outdoor signage or street-pole banners that need to withstand the elements.
On the other hand, if you're aiming for a more sophisticated, high-end look indoors, polyester fabric is your best bet. It has a beautiful, non-reflective matte surface that eliminates glare, making it the top choice for trade show backdrops, press conference backgrounds, and upscale retail displays where a premium presentation is key.
Essential Finishing Options
Finishing is the final, crucial step that gets your banner ready to hang and protects it from wear and tear. A great banner printing job can be ruined by skipping this part.
A professional finish does more than just complete the look—it's a critical component of a banner's structural integrity. It prevents fraying, provides secure mounting points, and ultimately extends the life of your investment.
Here are the most common and vital finishing options we work with:
- Reinforced Hemming: We fold the edges of the banner over and heat-weld them. This simple step creates a super-strong, double-thick border that stops the material from tearing or fraying, especially when it's pulled tight.
- Metal Grommets: These are the metal rings we punch along the hemmed edges. They give you durable, reinforced holes for hanging your banner with rope, zip ties, or bungee cords. We typically place them every two to three feet for secure mounting.
- Pole Pockets: We can create a sleeve at the top and/or bottom of the banner by folding over extra material and sealing it. This lets you slide a pole or rod right through for hanging—a popular choice for parades, processions, and certain indoor displays.
Mastering Design and File Preparation
Getting a brilliant idea from your screen onto a massive physical banner is all about the technical details. If you nail the file prep, your banner will look crisp and professional. Skip these steps, and you risk common (and costly) mistakes like fuzzy images or colors that just look off.
Here's the first thing we tell every client: for large format printing, high-resolution images are non-negotiable. A graphic can look perfectly sharp on your monitor but turn into a blurry mess when it's blown up to banner size. As a rule of thumb, always aim for 150 DPI (dots per inch) at the final, full print size.
Setting Up Your File Correctly
Getting your file settings right from the very beginning saves a world of trouble later. For instance, your computer screen displays colors in RGB (Red, Green, Blue), but our professional printers work in a different language: CMYK (Cyan, Magenta, Yellow, Black). To ensure the colors you see on screen are the colors we print, you absolutely must design in CMYK mode from the start.
You also need to give us some room to work around the edges. This is where bleeds and safety margins come in.
Bleed Area: Think of this as an overflow for your design. Extend your background colors or images about one inch past the banner's final trim line. This way, when we cut the banner to size, you won't get any unsightly white slivers along the edges.
Safety Margin: This is the opposite of a bleed. Keep all your important stuff—like text and logos—at least two inches inside the final trim line. This "safe zone" guarantees nothing critical gets accidentally trimmed off or punched through when we add grommets.
The best way to think about bleed and safety margins is as a protective buffer for your design. They give the machinery the tolerance it needs for trimming, ensuring your message stays complete and the final banner has a clean, polished look.
Designing for Maximum Impact
Finally, let’s talk about making your banner easy to read. People usually see banners from a distance, often while they're on the move, so your design needs to grab their attention and be understood in a split second.
Stick with large, clean fonts. You can't go wrong with classic sans-serif fonts like Helvetica or Arial because they're built for clarity. Pair that with a high-contrast color scheme—like bold, dark text on a light background or the reverse—and your message will pop. That's how you create a truly print-ready design that works out in the real world.
Decoding Banner Printing Costs and Timelines
Figuring out the cost of your banner project is the first step to keeping your budget in check. The final price you see on a quote isn't just a random number; it's a direct reflection of the materials and work that go into your specific banner.
The biggest variables are the banner's size, the material you choose, and any finishing touches like grommets or pole pockets. For instance, a big, heavy-duty 18oz blockout vinyl banner with reinforced hems is naturally going to cost more than a smaller, standard 13oz vinyl banner. It simply uses more material and requires more labor. The quantity you order also matters—ordering in bulk almost always brings down the price per banner.
Production and Delivery Timelines
Your timeline is just as important as your budget. While standard production for most banners takes a few business days, this isn't a hard and fast rule.
A key thing to remember is the difference between production time and shipping time. Production is the time it takes us to print and finish your banner. Shipping is the additional time it takes for the courier to get it to your door.
Several factors can affect how quickly we can get your project done:
- Order Complexity: A straightforward print is always faster than a job that needs custom cuts or a lot of finishing work.
- Current Workload: Like any shop, our production schedule can influence how quickly we can begin your project.
- Service Level: For those tight deadlines, most printers, Camelot included, offer rush services for an extra fee.
This kind of speed is possible thanks to the booming digital printing market, which hit a value of US$33.5 billion in 2024 and is expected to grow to US$57.1 billion by 2033. This industry growth helps us deliver custom jobs quickly. You can read more about the expansion of digital printing over at The Cannata Report.
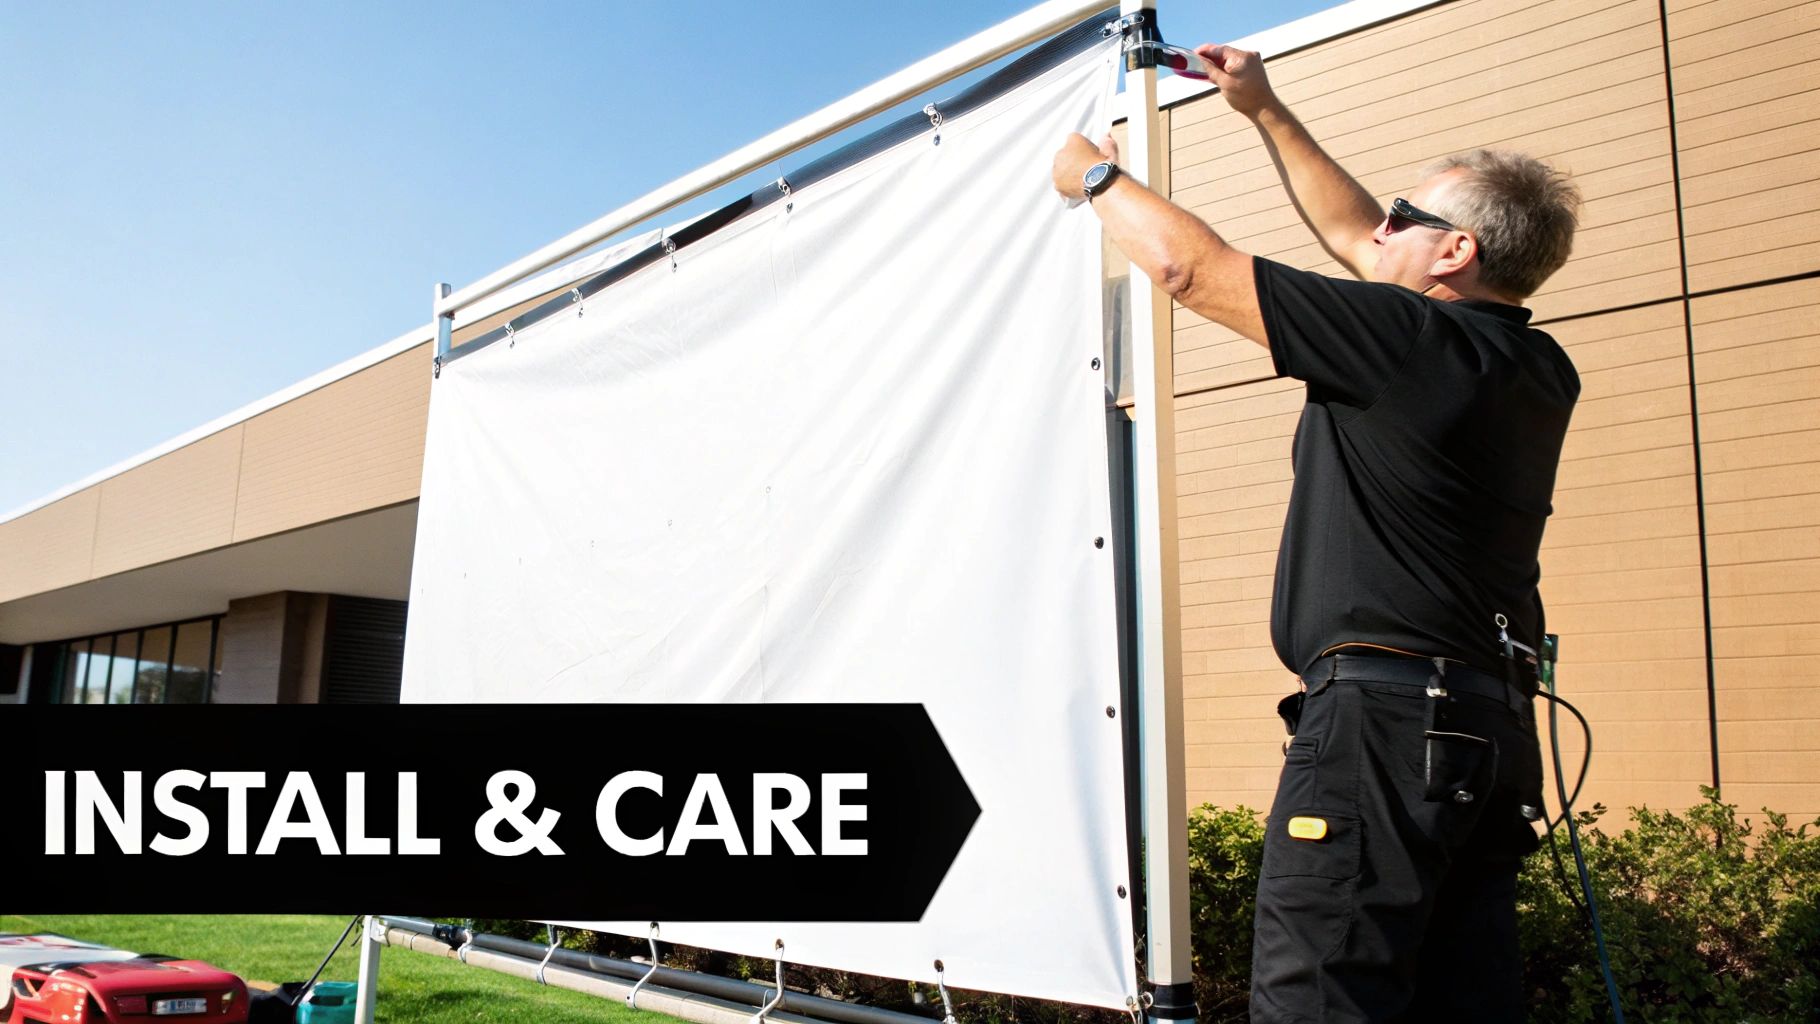
Best Practices for Banner Installation and Care
You’ve got a beautifully printed banner, but that's really only half the job done. How you install and care for it makes all the difference in how professional it looks and how long it actually lasts. A little bit of know-how here prevents the wrinkles, tears, and general wear that can cut a banner’s life short.
Getting the Installation Just Right
When it comes to hanging a vinyl banner, tension is everything. You want it to look crisp and flat, not like a sad, saggy sheet.
If your banner has grommets, grab some bungee cords or zip ties. Start by pulling the banner taut from all four corners, securing those first. Once the corners are tight, you can then go around and secure the rest of the grommets. This simple technique is the secret to getting rid of wrinkles and preventing that dreaded sag.
For retractable banners, there's one golden rule: always extend the support pole to its full height before you even think about pulling the banner up. Doing it the other way around can easily wreck the internal retraction mechanism.
Making Your Banner Last
Proper care is just as important as a good installation. With a little maintenance, you can reuse your banner for years to come.
Keeping it clean is simple. Just take a soft cloth and some mild, soapy water to gently wipe down any dirt on your vinyl or mesh banners. Steer clear of harsh chemical cleaners or anything abrasive, as they can easily scratch or fade the print.
Believe it or not, the number one killer of banners is improper storage. Never fold it! Instead, always roll your banner up, making sure the printed side is facing out. This little trick prevents deep creases from setting in and protects the ink from cracking.
Once it's rolled up, slide it back into its shipping tube or box. Store it somewhere cool and dry, and keep it out of direct sunlight. Follow these steps, and your banner will look just as good for your next event as it did for your first.
Why Partner with a Local Printing Expert
Sure, the big online printing giants offer a certain kind of convenience. But when it comes to getting your banner just right, they simply can't compete with the hands-on advantages of working with a local expert.
Choosing a local shop like Camelot means you get a real partner from start to finish. You can actually come in and feel the material samples, making sure the vinyl or mesh you pick has the exact texture and finish you pictured. It’s about getting it right the first time.
This kind of direct collaboration takes all the guesswork out of the process and builds genuine trust. Need to know what material will hold up best at a specific windy spot downtown? Unsure about local signage codes? That's where a local partner’s knowledge becomes invaluable—it’s guidance the online-only vendors just can't provide.
Tangible Benefits of Local Expertise
The demand for custom, high-quality work has actually fueled a resurgence for local print shops. The U.S. banner printing industry is expected to hit revenues of $2.2 billion by 2025, with the number of businesses growing to nearly 40,000. This isn't just random growth; it’s driven by the very things local printers do best. You can dig deeper into this trend over at IBISWorld's report on local print services.
So, what does that mean for you? A local partner offers real, practical benefits:
- Faster Turnarounds: We cut out the shipping delays. This means you get your banner much faster, which is a lifesaver when you're on a tight deadline.
- Quality Assurance: If there's an issue, you can talk to us in person, and we'll resolve it on the spot. No back-and-forth emails, just a commitment to making sure your final product is perfect.
- Community Investment: When you work with a local printer, you're not just a customer; you're a neighbor. You're putting money back into your own community and helping it thrive.
Frequently Asked Questions About Banner Printing
Even with all the details covered, a few specific questions always seem to pop up when it's time to print. We've been there. Here are some quick, straightforward answers to the questions we hear most often, so you can move forward with your project feeling certain you've got it right.
What Is the Best Resolution for Banner Printing?
Image resolution is everything when it comes to a sharp, professional-looking banner. The magic number really depends on how far away people will be when they see it.
For most standard banners viewed from a few feet back, 150 DPI (dots per inch) at the final print size is the sweet spot. It looks clean and gets the job done perfectly.
If your design has a lot of fine print or complex graphics that people will be reading up close, you’ll want to double that. Aim for 300 DPI to keep every single detail looking crisp and clear.
The key is to build your design file at the correct resolution from the very beginning. You can't just stretch a small, low-resolution image to fit a large banner—it'll come out blurry and pixelated every time, which completely undermines your message.
Think of it this way: DPI is like the number of threads in a fabric. More threads create a tighter, smoother, and more detailed image. When you start with too few threads and stretch them out, you see all the gaps, and the picture falls apart.
How Long Will My Outdoor Vinyl Banner Last?
The durability of an outdoor vinyl banner really comes down to three things: the material it’s made from, the quality of the ink, and how much of a beating it takes from the weather every day.
A quality banner printed on heavy-duty 13oz or 18oz vinyl using UV-resistant inks should hold up for 3 to 5 years. Of course, things like relentless sun, high winds, or severe weather will take a toll and can shorten that lifespan.
One of the single best things you can do to get the most life out of your banner is to install it correctly. Making sure it’s pulled tight and secure prevents it from flapping in the wind, which is a major cause of fraying and tearing over time.
Ready to create a banner that stands out and lasts? The team at Camelot Print & Copy Centers is here to help with expert advice and high-quality printing. Get your project started today.