Even with everything going digital, there's something uniquely powerful about a printed flyer. It’s a real, physical piece of your brand that someone can hold in their hands. Unlike a social media ad that vanishes with a thumb-swipe, a good flyer sticks around, making it a surprisingly effective tool, especially for local businesses.
Why Business Flyers Still Work in a Digital World

It’s tempting to think print is dead. After all, we live in a world of crowded inboxes and endless social media feeds. But that’s exactly why flyers have a unique advantage. The constant barrage of digital ads has created an opportunity for physical marketing to stand out and make a genuine impact.
Think about it: how many online ads do you mindlessly scroll past every day? Most are forgotten almost instantly. A professionally printed flyer, however, is a physical object. It has texture and weight, and that presence commands a different kind of attention. It’s a real-world handshake in an increasingly virtual world.
Cutting Through the Clutter
One of the biggest wins for a flyer is its ability to deliver a focused message without any distractions. When someone is looking at your flyer, they aren't getting pop-up notifications or seeing competitor ads on the same screen. For that moment, your business has their complete attention.
This direct line of communication is a game-changer for local businesses trying to connect with nearby customers. A flyer on a coffee shop bulletin board, handed out at a community event, or delivered to a mailbox guarantees you’re reaching a geographically relevant audience. It’s a smart, targeted way to make sure your marketing budget is hitting people who can actually walk through your doors.
A well-crafted flyer doesn't just inform; it creates a tangible connection. Unlike a digital ad that can be closed with a click, a physical flyer often finds a home on a desk or refrigerator, serving as a constant reminder of your brand.
Delivering Measurable Results
Beyond the feel-good benefits, the data proves that business flyer printing is a strategy that delivers a solid return. When it comes to getting people to take action, printed materials often leave their digital counterparts in the dust.
Industry data shows response rates for printed flyers land between 2.7% and 4.4%. That might not sound like a lot, but compare it to the typical 0.6% response rate for an email marketing campaign. Suddenly, that flyer is four to seven times more effective at getting a direct response. This is why flyers remain a go-to tool for everyone from restaurants announcing a new menu to real estate agents promoting an open house. You can review more flyer statistics and see how they stack up against other channels.
Step 1: Choosing the Right Flyer Size for Your Goal
Picking the right size for your flyer is a lot like choosing the right tool for a job. You wouldn't use a sledgehammer to hang a picture, right? In the same way, you don't want a massive poster-sized flyer for a simple handout. The dimensions you pick have a huge impact on your flyer’s purpose, how easily people can carry it, and the impression it leaves.
This isn’t just about measurements; it’s a strategic choice. The size dictates how much you can say and how people will interact with your flyer. Get the size right, and your message lands perfectly, whether it's for a quick glance or a detailed read. Nailing this first step is fundamental to getting your business flyer printing project off to a strong start.
Standard Sizes for Maximum Versatility
When in doubt, the classic Letter size (8.5” x 11”), or its international cousin A4, is the go-to for a reason. It's the dependable workhorse of the flyer world. This format gives you plenty of room to play with—you can fit in compelling images, detailed text, and a clear call to action without everything feeling crammed together.
This size is perfect for things like:
- Detailed Service Menus: A local spa or landscaping company can neatly list all their offerings and prices.
- Real Estate Listings: There’s enough space for beautiful property photos, detailed descriptions, and agent contact info.
- In-Store Promotions: These are easy to post on countertops or bulletin boards to announce a big sale or upcoming event.
Everyone recognizes this size, which makes it a comfortable and professional choice for almost any business need.
Compact Flyers for Events and Direct Mail
Sometimes, smaller is better, especially when you need something portable for wide distribution. Compact sizes are made to be slipped into a pocket, handed out in a crowd, or tucked into a mailer without being a hassle.
The Half-Letter (5.5” x 8.5”), or A5, hits a sweet spot. It’s big enough to make a visual impact but small enough to feel modern and convenient. Even smaller postcard sizes (like 4" x 6" or 5" x 7") are fantastic for short, snappy messages and are perfectly suited for direct mail campaigns.
These smaller formats are ideal for:
- Event Handouts: Quickly give attendees at a trade show or festival the essential details.
- Special Offer Coupons: Create a tangible offer that customers can easily hold onto and bring back to your store.
- Package Inserts: A great way to thank customers for their order and promote a related product.
Think of your content as water and the flyer as a glass. You need to pick a glass that's the right size. Too small, and your message overflows into a cluttered mess. Too big, and a simple announcement looks lost and insignificant.
Matching Flyer Size to Your Marketing Goal
So how do you decide? It all comes down to your distribution plan and what you want to achieve. Before you commit to a size, just ask yourself: "How am I actually going to get this into my customers' hands?" Answering that one question will point you toward the perfect format.
To make it even easier, here’s a quick guide to help you match your goal with the right flyer size.
Common Business Flyer Sizes and Their Best Uses
This table is a simple cheat sheet to help you pick the most effective flyer size for your specific project.
| Flyer Size (US/Metric) | Dimensions (Inches) | Best For | Design Tip |
|---|
| Letter / A4 | 8.5" x 11" | Detailed service lists, corporate handouts, real estate listings, and informational sheets. | Use columns and clear headings to organize dense information and improve readability. |
| Half-Letter / A5 | 5.5" x 8.5" | Event promotions, product announcements, and restaurant menus where portability is key. | Focus on one strong headline and a single, high-quality image to grab attention quickly. |
| Postcard / A6 | 4" x 6" | Direct mail campaigns, appointment reminders, and simple coupons or discount offers. | Keep your message extremely brief and punchy. The front should be visual, the back functional. |
| Rack Card | 4" x 9" | Displaying in racks at hotels, tourist centers, or reception desks for take-away info. | Design with a top-third focus, as this is the part most visible when stacked in a holder. |
By thinking through your goal first, you can confidently choose a size that ensures your flyer doesn't just look good, but actually works hard for your business.
How to Prepare a Flawless Print-Ready Design File
Sending your design file to a printer can feel a bit like sending a kid off to their first day of school. You've done all the hard work, and now you just have to trust that it will come back looking exactly as you hoped. The good news is that you don't have to leave it to chance. By preparing a perfect, print-ready file, you’re basically handing the printer a foolproof blueprint for success.
Think of your digital design as the recipe for your final business flyer printing project. One tiny mistake in that recipe—like a blurry photo or a misplaced logo—can spoil the whole batch. Let’s walk through the essential setup steps, breaking down the technical jargon so what you see on your screen is exactly what you get in your hands.
Building Your Blueprint: Bleed, Trim, and the Safe Area
Ever used painter's tape? To get a clean, sharp edge, you always paint a little bit over the tape. That way, when you peel it off, there are no frustrating white gaps. The concept of a bleed in printing is exactly the same. It’s a small, extra margin of your background color or image that extends past the final cut line of your flyer.
The industry standard for a bleed is 0.125 inches (or 1/8 inch) on all four sides. This little bit of extra design gets trimmed off, but it's your insurance policy against ugly white slivers at the edge of your finished flyers.
Here’s a simple breakdown of how these three key zones work together:
- Trim Line: This is the actual edge of your finished flyer. For example, a standard letter-sized flyer has a trim line of 8.5" x 11".
- Bleed Area: This is the outer section that gets chopped off. Your background image or color absolutely must extend all the way out to cover this area.
- Safe Area: This is an inner margin, usually another 0.125 inches inside the trim line. Keep all your important text, logos, and phone numbers inside this zone to guarantee they won’t get accidentally snipped during cutting.
This simple diagram shows how different goals might lead to different flyers, but the core setup principles are always the same.
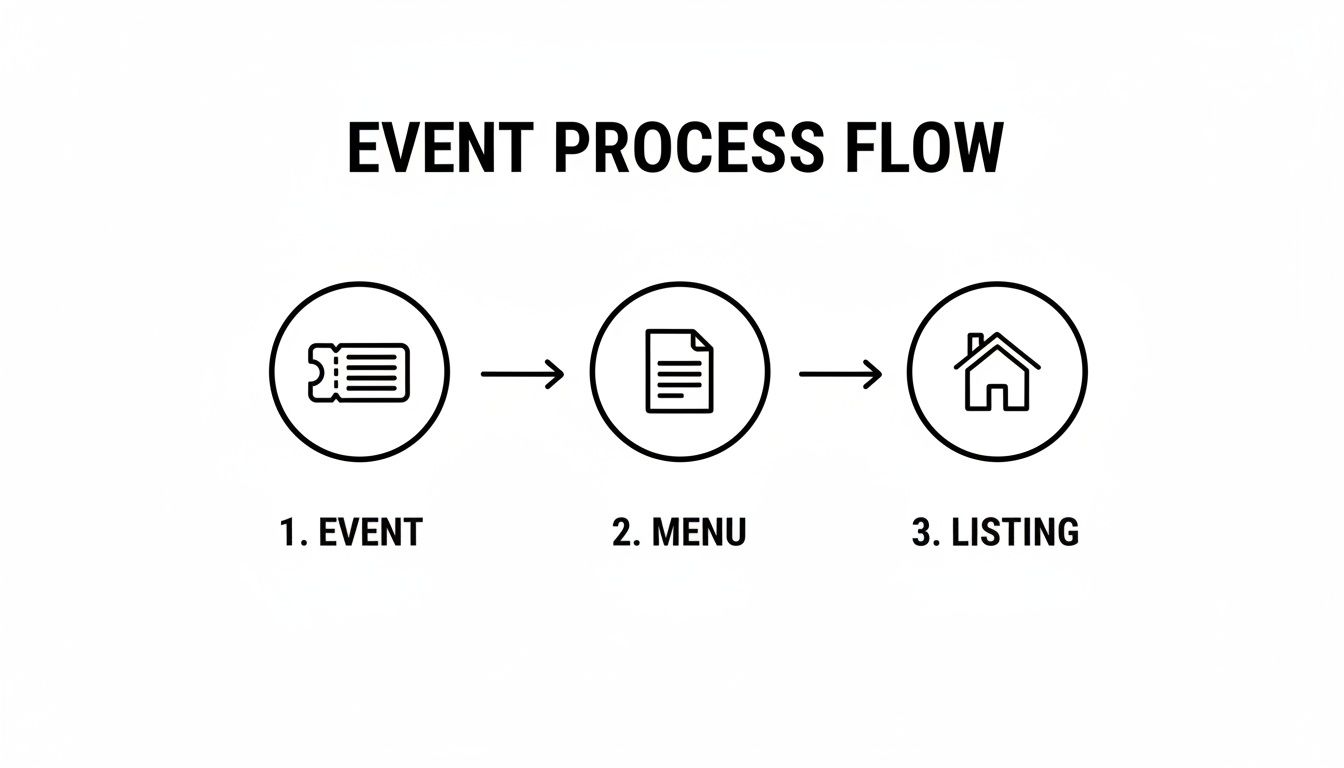
Whether you’re creating a flyer for an event, a menu for a restaurant, or a real estate listing, getting the bleed, trim, and safe area right is the first step to a professional result.
Speaking the Printer’s Language: CMYK Color and Resolution
Your computer screen and a commercial printing press speak two completely different languages when it comes to color. Your screen uses RGB (Red, Green, Blue), a system that mixes light to create colors. It's fantastic for websites and digital photos, but it just doesn't work for ink on paper.
Printers use a different system called CMYK (Cyan, Magenta, Yellow, Key/Black). This is a "subtractive" model where inks are layered on paper to absorb light and create your final colors. To avoid your vibrant reds turning out muddy orange, you need to set your design file’s color mode to CMYK right from the start.
Think of it this way: setting your file to CMYK is like giving your printer directions in their native language. It ensures nothing gets lost in translation, so your brand colors look just as brilliant on paper as they do on your monitor.
The other half of the quality equation is resolution, which is measured in DPI (Dots Per Inch). For a printed piece to look sharp and professional, your images and the entire design file need to have a resolution of at least 300 DPI. Most images you find online are a much lower 72 DPI, which looks fine on a screen but becomes a blurry, pixelated mess when printed. Always start with high-resolution photos.
When it comes to saving your file, a high-resolution PDF is the gold standard. A PDF is like a locked container that keeps all your fonts, images, and layout perfectly in place, no matter who opens it. When you export from your design program, look for a preset like "Press Quality" or "High Quality Print." That will automatically apply all the right settings for a perfect print run.
Getting the Feel Right: Choosing Paper and Finishes
The words and images on your flyer are important, but the paper itself is the first thing your customer will notice. Long before they read a single word, they'll feel the quality in their hands. Getting this part of the business flyer printing process right is a subtle but powerful way to communicate your brand's commitment to quality.
Think of it like the fabric of a good suit. You can get something off the rack that works, or you can choose a material that feels substantial and looks incredible. A lightweight paper gets the job done, but a premium, heavy cardstock makes a statement—it feels important, commands respect, and makes a much stronger first impression.
Paper Weight and Why It Matters
Paper weight, usually measured in pounds (lb), is all about thickness and sturdiness. It might sound like a minor detail, but it has a huge impact on how people perceive your brand. A flimsy flyer can feel cheap and disposable, while a thicker stock feels more permanent and valuable.
Here’s a quick rundown of the common choices and where they shine:
- 100 lb Text Stock: This is the go-to for a reason. It's noticeably heavier than your standard office paper, giving it a professional feel without being too stiff or expensive. It’s the perfect workhorse for high-volume handouts at events or for mailers where you still want to project quality.
- 130 lb Cover Stock: When you need your flyer to feel like a big deal, this is it. It’s a thick, durable cardstock that’s perfect for high-end marketing, luxury menus, or any handout you want people to keep. It resists bending and creasing, so it stays looking sharp.
So, which one is for you? If you’re blanketing a trade show with thousands of flyers, the 100 lb text is a fantastic balance of quality and cost. But if you're sending an exclusive offer to your best clients, the 130 lb cover stock makes that offer feel truly special.
Choosing a Finish to Make Your Design Pop
The finish is a coating applied after printing that protects the ink and completely changes the look and feel of your flyer. Each one has a different personality, so you’ll want to pick the one that best suits your design and your brand.
Glossy FinishA glossy finish is shiny and reflective, making colors look super bright and saturated. It's a high-energy look that’s perfect for flyers loaded with vibrant photos.
- Best For: Retail promotions, concert flyers, and any design where you need eye-catching visuals to do the heavy lifting.
Matte FinishA matte finish gives you a smooth, non-reflective surface for a more subtle and elegant vibe. It’s brilliant for designs with a lot of text because it cuts down on glare, making it easy to read from any angle.
- Best For: Professional services, corporate info sheets, and any brand going for a clean, modern, and sophisticated feel.
Uncoated StockJust like it sounds, this paper has no extra coating, leaving it with a natural, slightly textured feel. It’s the easiest to write on, making it the clear winner for flyers that double as appointment cards or have fill-in-the-blank sections.
- Best For: Organic brands, local cafes, appointment-based services, or any flyer that could benefit from a personal, handcrafted touch.
Think of your flyer's finish as its handshake. A glossy finish is energetic and outgoing, while a matte finish is calm and confident. Pick the one that introduces your brand the way you want to be seen.
Adding a Touch of Class with Special Finishes
If you really want your flyer to stand out from the stack, special finishes can turn it from a simple handout into a keepsake. These options add a sensory experience that makes people stop and take a closer look.
One of the best ways to do this is with Spot UV. This technique applies a super glossy, clear coating to specific parts of your design—like your logo, a headline, or a product photo—while the rest of the flyer stays matte. The contrast between the shiny and flat areas is stunning, drawing the eye exactly where you want it to go. It’s a small detail that screams professionalism and shows you invested in making something special.
Getting Smart About Print Costs and Finding the Best Value
Every marketing dollar counts, so making smart, budget-conscious decisions is non-negotiable. When it comes to printing business flyers, the final price tag isn't some arbitrary number—it’s a direct result of the choices you make. Understanding these factors puts you in the driver's seat, letting you find that sweet spot between quality, quantity, and cost.
Think of your flyer's price as an equation. The biggest variables are how many you order, the paper you pick, and any special finishes you add. It's just like customizing a new car; upgrading from standard cloth seats to premium leather costs more. The same logic applies here—moving from a basic 100 lb text stock to a thick 130 lb cover with a slick Spot UV finish will bump up your investment.
The Power of Cost Per Piece
Here’s a concept that will save you a ton of money: cost-per-piece. It’s simple—just divide the total cost of your order by the number of flyers you get. This is where the real magic of commercial printing kicks in, because as your order quantity goes up, your cost-per-piece plummets.
For example, printing 500 flyers might run you $1.00 each. But bump that order up to 5,000, and the price could drop to just $0.20 per flyer. This is why planning is your best friend. If you have three events coming up over the next six months, ordering all your flyers at once is vastly more economical than placing three separate, smaller orders.
Think of it like a Costco run. A single roll of paper towels is surprisingly pricey, but buying the 12-pack slashes the cost of each one. Printing works the exact same way—the more you print in a single run, the less you pay for each individual piece.
This principle, known as economy of scale, is especially powerful with offset printing. This is the traditional method for big jobs. While it has higher initial setup costs, it becomes incredibly efficient for runs in the thousands, giving you the absolute lowest cost-per-piece for mass distribution.
Digital Printing for Flexibility and Speed
But what if you don't need a mountain of flyers? For smaller, more targeted campaigns or when you're in a time crunch, digital printing is your go-to. Digital has virtually no setup cost, making it perfect for short runs of 50, 100, or 500 flyers.
This flexibility is fantastic for testing different designs, creating personalized mailers for specific customer groups, or just getting something printed for a last-minute trade show. The cost-per-piece will be higher than a huge offset run, but your total out-of-pocket cost is much lower for small batches. You get professional quality without a massive upfront commitment.
Ultimately, the choice between offset and digital boils down to two things: how many you need and how fast you need them. Today, typical flyer printing costs range from $0.12 to $0.98 per piece, depending on these factors. For many small businesses, an order of 1,000 flyers often lands in the $800–$1,000 range for both printing and distribution, which shows just how much bulk ordering can drive down that unit price. You can even explore additional printing industry trends to see how these costs are shifting.
Finalizing Your Order: Proofs, Turnaround, and Delivery
You’ve designed a great flyer, picked the perfect paper, and have a good handle on the costs. We're on the home stretch now, but there's one crucial step left before your project goes to press: the proofing process.
Think of this as your final walkthrough. It’s your last, best chance to catch any sneaky typos or layout issues before hundreds or thousands of copies are printed.
Giving the Green Light: What is a Proof?
Approving a proof is you telling the printer, "Everything looks perfect, let's do this!" It's your official sign-off, confirming that you've checked every last detail—from the spelling of your website address to the placement of your logo. Trust me, you don't want to skip this.
Most professional printers will offer you two options, and knowing which one to choose can save you time and money.
- Digital Proof: This is the standard choice for most jobs. You'll get a PDF that shows exactly how your file is set up for the press, including the bleed and safe areas. It’s fast, usually free, and perfect for catching typos or making sure nothing important got cut off.
- Hard-Copy Proof: If color is absolutely critical to your brand or you’re splurging on a unique paper finish, a hard-copy proof is worth its weight in gold. It’s a single, fully printed version of your flyer. You can hold it, feel the paper, and see the colors in real-world lighting before committing to the full print run.
Approving your proof is the point of no return. Double-check every phone number, website, and date. A small typo can render an entire print run useless, so take the time to review it meticulously.
From Print to Pavement: Planning Your Timeline
Once you give that final "okay" on the proof, the production clock starts ticking. For most standard digital print jobs, the turnaround time—the time it takes to print your flyers—is typically between 2 to 5 business days. If you've ordered something more complex, like a folded flyer with spot UV, or a massive offset run, expect it to take a bit longer.
Don’t forget to add shipping time to your schedule. This is a big reason why many businesses are choosing to work with local or regional printers. With the print advertising distribution market in the U.S. projected to hit $4.5 billion by 2025, getting things quickly and reliably is more important than ever. A local partner like Camelot Print & Copy Centers can often get your order to you faster and with fewer logistical headaches. If you're interested, you can discover more about print advertising industry trends and see why this is a smart move.
Finally, think about what happens when that big box of flyers lands on your doorstep. Do you have a mailing list ready to go? A spot cleared on your front counter? A plan for the trade show next month? Having your distribution strategy sorted out beforehand is the key to a successful project from start to finish.
Got Last-Minute Questions? We've Got Answers
As you get ready to send your design to print, a few questions always pop up. It’s completely normal. Getting these details right is the difference between a good flyer and a great one, so let's walk through the most common queries we hear from business owners.
Think of this as your final pre-print checkup. A few minutes here can save you a lot of headaches later and ensure your finished flyers look exactly how you imagined.
What’s the Best File Format for Printing Flyers?
Stick with a high-resolution PDF (Portable Document Format). This is the gold standard for a reason. A print-ready PDF is like a self-contained package—it locks in all your fonts, images, and layout details, so what you see on your screen is exactly what we see on ours.
When you're ready to save your work, look for an export setting like "Press Quality" or "High Quality Print." This will automatically handle the technical stuff, ensuring you've got the necessary 300 DPI resolution and CMYK color mode. While you might see options for JPEGs or TIFFs, a PDF is your best bet for a flawless print run without any surprise formatting shifts.
How Much Bleed Do I Need to Add?
The magic number is 0.125 inches (or 1/8 of an inch) on all four sides. Bleed is a small, extra margin you add to your design, and it’s absolutely essential if you have any colors or images that go right to the edge of the page.
So, if you're designing a standard 8.5 x 11-inch flyer, your actual file should be a little bigger: 8.75 x 11.25 inches.
Think of the bleed area as a safety net for the trimming machine. It gives the blade a little wiggle room, guaranteeing your flyers have a clean, professional edge with no weird white slivers.
Can I Get a Sample Before Printing the Whole Batch?
Absolutely. In the printing world, this is called a "hard-copy proof," and we highly recommend it for larger orders or any project where perfect color is a must. A hard-copy proof is a single, finished flyer printed on the exact paper stock with the same inks that will be used for your full run.
It’s your chance to hold it in your hands, check the colors under your office lights, and feel the paper weight before you give the final green light. It might add a day or two to your timeline, but the confidence you get from knowing your entire order will be perfect is priceless.
Ready to bring your flyer design to life with professional quality and expert support? Camelot Print & Copy Centers offers fast, reliable business flyer printing services to help your brand make a powerful impression. Start your print project with us today!