A great poster does more than just fill a space on a wall—it’s a physical, powerful marketing tool that can stop people in their tracks and cut right through the constant hum of digital advertising. When you get poster printing right, you turn your vision into something tangible that can transform a casual glance into genuine customer interest. This guide is your complete roadmap for navigating that process from start to finish.
Your Blueprint for High-Impact Business Posters

In a world overflowing with digital ads, the physical presence of a poster gives you a unique edge. It can command attention in a busy store, announce an upcoming event with authority, or simply get critical information across in a place where people will actually see it.
But getting a professional result doesn't happen by accident. It takes careful planning, from the first spark of an idea to the final printed piece.
We've designed this guide to make that journey straightforward, breaking it down into clear, manageable steps. We'll walk you through all the key decisions you'll need to make to ensure your project is a resounding success. By the end, you'll have the confidence to order posters that not only look fantastic but also achieve your business goals.
Why Posters Still Matter in a Digital World
Even with the dominance of online marketing, the appeal of printed media hasn't faded. In fact, the global market for custom poster printing is expected to hit $2.43 billion by 2030. That’s some serious growth, and it proves that businesses of all sizes still rely on posters to make a real-world impact.
A truly effective poster starts long before you ever talk to a printer. It all begins with a strong concept and a design that gets your message across without any confusion. To really make your poster work for you in a commercial space, it helps to understand how it fits into the bigger picture. Digging into the principles of visual merchandising can give you a ton of insight into how posters and other visuals drive sales.
If you have great ideas but aren't sure how to turn them into a polished, print-ready file, bringing in a professional can make all the difference. Our https://www.camelotprintandcopy.us/services/graphic-designs can help make sure your vision is executed perfectly, right from the very beginning.
To help you get organized, think of the poster printing process in distinct stages. Each stage has a critical decision that will directly impact the quality and effectiveness of your final product.
Table: Key Decisions in the Poster Printing Process
Thinking through these key areas ahead of time will save you headaches and ensure you end up with a poster you're proud to display.
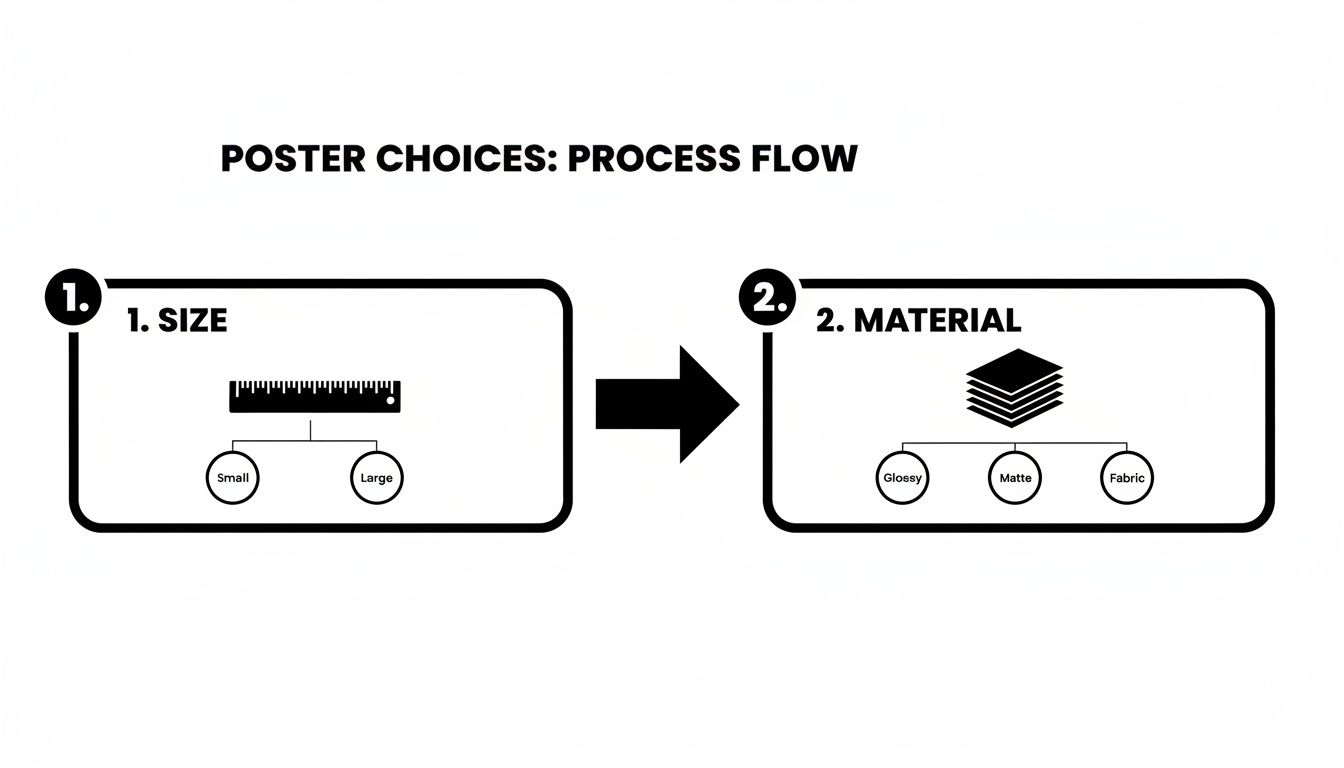
Choosing the Right Poster Size and Material
Before you even think about firing up your design software, there are two crucial decisions you need to make: how big your poster will be and what it will be printed on. These aren't just minor details—they’re the foundation of your whole project. Get them right, and your message will hit home. Get them wrong, and you might as well have not printed the poster at all.
Think of it this way: poster size is all about viewing distance. A poster slapped on a telephone pole needs to scream its message from across the street, while one pinned to a coffee shop corkboard can afford to be more intimate. Matching the scale to the environment is the first step to making sure people actually see and read what you have to say.
Matching Size to Your Business Goal
So, how do you pick the right dimensions? It all comes down to where the poster will live and what you need it to do.
11" x 17" (Tabloid Size): This is your workhorse for up-close-and-personal messaging. It’s the perfect size for posting on community boards, taping up in a breakroom, or placing right next to a product at the point of sale. Think detailed event schedules, informational flyers, or menu specials.
18" x 24" (Medium): Probably the most versatile and popular size out there. It’s big enough to catch someone’s eye from across a small room but not so huge that it feels overwhelming. We see these used all the time for in-store sales promotions, directional signs at events, or concert announcements.
24" x 36" (Large Format): When you need to make a statement, this is your go-to. It’s the classic "movie poster" size for a reason—it’s built for impact. This is what you want for a trade show booth, a big retail window display, or any situation where your message needs to compete for attention.
Selecting the Perfect Poster Material
Just as size dictates visibility, the material—or substrate, as we call it in the print world—sets the tone and determines how long your poster will last. The right paper can make your colors sing, while the wrong one can make a brilliant design look flat and cheap.
A poster's material is its handshake. A glossy finish gives a slick, modern feel perfect for a product launch, but for an outdoor banner that needs to survive a rainstorm, you'd be foolish to use anything but a tough, weather-resistant vinyl.
Here are a few of the most common materials we work with:
Matte Paper: A classic for a reason. This non-reflective finish gives your poster a sophisticated, almost artistic feel. It’s fantastic for designs with a lot of text because there’s no glare, making it super easy to read under bright lights.
Glossy Paper: If your design is all about vibrant, punchy images, gloss is your friend. It makes colors look deeper and more saturated, which is perfect for photography, movie posters, or anything where you want the visuals to leap off the page.
Vinyl or Synthetic Stock: Need something that can take a beating? This is it. Vinyl is tear-proof and weather-resistant, making it the only real choice for outdoor signs, long-term displays, or any poster that will be handled a lot.
Fabric: A bit of a specialty item, but incredibly useful. Fabric posters are lightweight, they don't crease, and they're a breeze to travel with. That’s why you see them everywhere at academic conferences and trade shows—they're practically designed for a suitcase.
Picking the right combination of size and material isn't just about making your poster look good; it's about making sure it works. A well-thought-out poster will do its job effectively, no matter where you put it.
Getting Your Digital File Ready for a Flawless Print
Once you've nailed down the big-picture items like size and material, it’s time to zoom in on the file itself. This is where a little prep work can save you a world of frustration and prevent those costly reprints.
The truth is, the final printed poster will only ever be as good as the digital file you send us. Getting a few key settings right—resolution, color mode, and bleed—is what separates a sharp, professional-looking poster from a blurry, disappointing mess.
Why Image Resolution is Everything
Think of your image's resolution as its DNA. It’s made up of tiny little dots, and the more dots you pack into every inch, the sharper and clearer the final picture will be. We measure this in DPI, or Dots Per Inch.
For any professional poster printing, the gold standard is 300 DPI at the poster's final, full size. It’s a common mistake to grab a small image from a website, which is often only 72 DPI, and expect it to look good when blown up. On a screen, it might look fine, but on paper, it will come out pixelated and fuzzy. Always, always start with the highest quality source image you can get your hands on.
From Glowing Screen to Inked Paper: The Color Shift
Here’s one of the most common "gotchas" in the print world: the colors on your backlit computer screen are fundamentally different from the colors a printer creates with ink on paper.
- RGB (Red, Green, Blue): Your monitor uses this system. It adds light together to create a vibrant spectrum of colors. It’s perfect for digital displays.
- CMYK (Cyan, Magenta, Yellow, Black): This is the world of print. We subtract light by layering these four ink colors onto paper.
It's absolutely crucial that your design file is converted from RGB to the CMYK color space. If you don't, you risk a painful surprise. That brilliant electric blue on your screen might turn into a dull purple, and your deep, rich reds could end up looking flat and muted.
Any professional design software will let you work in CMYK mode from the very beginning, which is always the best way to go. Following a structured graphic design process is a great way to make sure these technical details are handled correctly every time.
The Magic of a Print Bleed
Ever seen a brochure or business card with an ugly, sliver of a white edge where the color was supposed to go all the way? That’s what happens when a file has no bleed.
A bleed is simply a small safety margin—usually 1/8th of an inch—where your design extends past the final trim line of the poster. Imagine it's like coloring a picture and going a little bit over the lines on purpose.
Because the final trim is done by a high-powered mechanical cutter, there can be tiny, microscopic shifts. That extra bit of design, the bleed, ensures that even if the cut is a hair off, your color or image will still run perfectly to the very edge. No white slivers, just a clean, professional finish. And when you're ready to save, the file format matters. Our guide on creating print-ready PDFs will walk you through the final steps.
Step 4: Add Finishes for Durability and a Professional Look
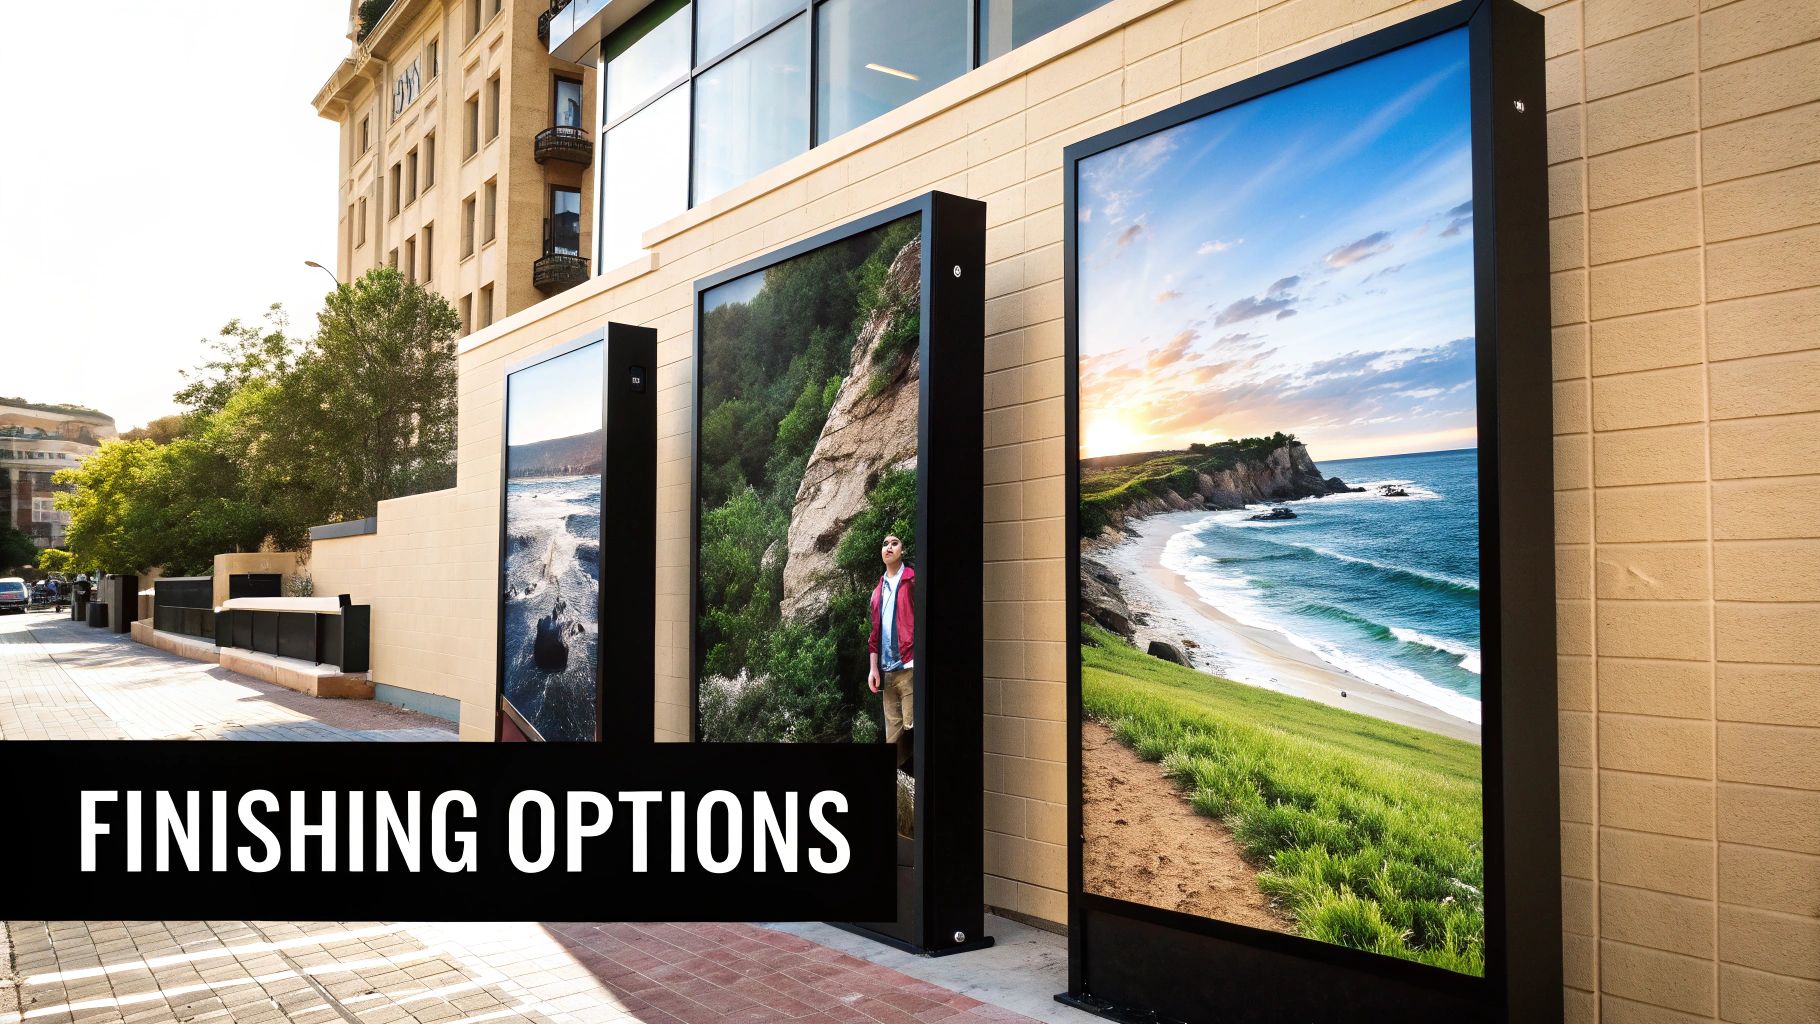
You’ve put in the hard work designing a great poster and picking the perfect paper. Now it’s time for the final touches that really make it stand out. Finishes like lamination and mounting aren't just cosmetic—they're practical investments that shield your poster from damage and give it a polished, professional appearance.
Think of it like framing a piece of art. The frame and glass don't just look good; they protect the artwork and complete the presentation. The same goes for your poster. These final steps turn a simple print into a durable marketing tool ready for the real world.
The demand for high-quality, long-lasting displays is massive. The global market for posters and frames is valued at USD 6.6 billion, showing just how much businesses rely on these materials. You can dig deeper into the posters and frames market trends at WiseGuyReports.com.
Use Lamination as a Protective Shield
Lamination is essentially a thin layer of plastic film applied over your poster. It’s a fantastic way to guard against everyday hazards like smudges, fingerprints, moisture, and even fading from UV light. The type of laminate you pick also dramatically affects the final look.
- Gloss Lamination: This finish gives your colors an extra pop, making them look deeper and more vibrant. It adds a noticeable shine that’s perfect for photo-heavy designs or any poster you want to have a high-impact, modern feel.
- Matte Lamination: For a more understated, elegant look, a matte finish is the way to go. It cuts down on glare, which is a huge plus for posters displayed under bright lights. The result is a smooth, non-reflective surface that feels sophisticated.
Give Your Poster a Backbone with Mounting
Does your poster need to stand up on its own at an event or hang perfectly flat on a wall without a frame? Mounting is the answer. We adhere your print to a rigid backing board, which stops it from curling, bending, or warping over time.
Mounting gives your poster structural integrity. It’s the difference between a print that just hangs on a wall and a display that commands attention with a professional, gallery-quality presence.
The right mounting option really comes down to where and for how long the poster will be used. A lightweight foam board is a great, budget-friendly choice for short-term projects, like a presentation or weekend event signage. But for something more permanent, like a display in a corporate office or a long-term retail promotion, a tougher material like gatorboard is a much smarter investment.
To help you decide, here’s a quick-reference guide to the most common finishing and mounting options.
Comparing Finishing and Mounting Options
Choosing the right combination ensures your poster not only looks fantastic on day one but continues to represent your brand well for its entire lifespan.
These finishing touches are what create truly effective signage. For more ideas on how to elevate your brand’s visibility, check out our guide on custom business displays that go beyond the traditional poster.
Navigating the Proofing and Ordering Process
Alright, you’ve nailed down the design and picked your materials. Now we’re on the home stretch—the part where we move from a digital file to a finished product in your hands. This is all about the final checks and logistics that ensure a smooth handoff to the print shop.
Think of this as the final pre-flight check before takeoff. It's your last chance to catch any little errors, lock in the final cost, and figure out when you’ll get your posters. A little care here goes a long way in making sure what you get is exactly what you wanted.
The Critical Importance of Proofing
Before a single poster from your full order hits the press, you'll get a proof. This is simply a preview of your finished poster, and it’s your chance to give the final green light. Seriously, don't ever skip this. It's the ultimate safety net.
You'll typically see one of two types of proofs:
- Digital Proof (Soft Proof): This is usually a PDF sent via email. It’s fantastic for a quick review of the layout, checking for typos, and making sure all your images and text are where they’re supposed to be.
- Hard Copy Proof (Press Proof): This is a physical, one-off print of your actual poster, often on the exact material you chose. It might cost a bit extra and add a day or two, but it's the only way to be 100% certain about the color. What you hold in your hand is exactly how the final run will look.
When you approve a proof, you're essentially signing off on the job. You're telling the printer, "Yes, this is perfect. Print it." For any project where brand colors have to be spot-on, a hard proof is non-negotiable.
Understanding Cost and Turnaround Times
A few key things will determine the final price tag for your posters. Knowing what they are helps you stay on budget and make informed decisions.
Key Cost Factors:
- Quantity: The price per poster almost always drops as your order size goes up. That’s because the initial setup cost gets distributed across more pieces.
- Size and Materials: No surprise here—bigger posters and premium materials like vinyl or canvas will cost more than smaller prints on a standard paper stock.
- Finishing Options: Lamination and mounting will add to the cost, but they also add serious durability and a more professional look to your final product.
Turnaround time is the period between when you approve the proof and when the posters are ready. This can be anywhere from a couple of days to a week or more, depending on your printer's schedule and how complex your job is.
Always ask for an estimated timeline upfront. If you have a firm deadline for an event or campaign launch, make that crystal clear from the start. Good communication here is the secret to a stress-free process.
Got Last-Minute Questions About Your Poster Project?
Even the most well-prepared project can hit a few snags or raise last-minute questions. It's completely normal. Getting those final details ironed out is what separates a good poster from a great one, and it's the key to ordering with confidence.
Let's walk through some of the most common questions we hear from clients. Think of this as your quick-hit guide to resolving those nagging little doubts before you send your file to print.
What’s the Best Resolution for Printing a Poster?
For a sharp, professional-looking poster, you'll want to aim for a resolution of 300 DPI (dots per inch) at the final, printed size.
Think of it like building a mosaic. The more tiny tiles (dots) you have to work with, the clearer and more detailed the final picture will be. If you try to create a large poster using a low-resolution image, like a 72 DPI photo you grabbed from a website, it’s like trying to build that mosaic with just a handful of big, chunky tiles. The end result will look blurry, blocky, and pixelated.
The best practice is always to start your design with the highest quality photos and graphics you can get your hands on. If you're not sure about your file, don't worry. Your print partner can take a look and tell you if it's good to go for the size you want. This quick check can save you a world of disappointment later.
How Much Does It Actually Cost to Print a Poster?
This is a big one, but the answer isn't a single number. The final price tag for your poster project is a mix of four key ingredients:
- Size: It's simple—bigger posters use more ink and more paper, so they cost more. A standard 18x24 inch print will always be more budget-friendly than a massive 24x36 inch one.
- Material: The paper or substrate you choose makes a huge difference. Basic matte paper is the most economical choice, but if you step up to premium materials like heavy gloss paper, weather-resistant vinyl, or even specialty fabrics, the cost will reflect that quality.
- Quantity: Here’s where you can really find some savings. Print production is a game of efficiency. The more posters you order at once, the lower your price-per-poster will be. It's almost always cheaper per piece to order 100 than it is to order 10.
- Finishes: Extra touches that add durability and polish, like protective lamination or mounting the poster onto a stiff foam board, will also add to the final cost.
The only way to get a truly accurate price is to ask for a custom quote based on your specific needs.
It's easy to get fixated on the per-poster price, but don't forget the bigger picture. Spending a little more on a durable, laminated vinyl poster for an outdoor A-frame sign is a smart investment if it saves you from reprinting a soggy paper version every few weeks.
What Is a “Bleed” and Do I Really Need One?
A bleed is a little bit of your design’s background that extends past the final trim edge of the poster. We typically recommend adding a bleed of about 1/8th of an inch on all four sides. And yes, you absolutely need one for a professional result.
Here's why: posters are printed on large sheets and then cut down to size with a powerful mechanical guillotine. While these cutters are incredibly precise, we're talking about machines and paper, so tiny, microscopic shifts can happen from one cut to the next.
The bleed acts as a safety buffer. Without it, even the slightest shift could leave a thin, unprofessional-looking sliver of white paper along the edge. With a bleed, your background color or image goes all the way to the edge and beyond, so no matter what, the final trim looks clean, crisp, and perfect.
Can I Use a Photo I Took on My Phone?
Maybe! It all comes down to the quality of your phone's camera and the size you want your poster to be. Many modern smartphones take fantastic, high-resolution pictures that look absolutely great when printed as smaller posters—say, up to 11x17 inches.
The challenge comes when you want to go big. For large-format posters (24x36 inches and up), a photo from a phone might not have enough detail to stay sharp when blown up to that size. It can start to look a little soft, grainy, or pixelated. For those huge, eye-catching prints, an image from a dedicated DSLR camera is always the safer bet.
If a phone photo is all you have, just ask your printer to check the file quality before you give the green light.
Ready to turn your vision into a high-impact poster? The experts at Camelot Print & Copy Centers are here to help with every step, from file checks to final production. Get a quote for your next project today.