Your wedding invitation isn't just a piece of paper. It's the very first hint your guests get of the incredible day you're planning. Think of it as the opening act, the first chapter that sets the stage for everything to come. This is where professional wedding invitation printing comes in—it takes your design from a file on a screen and turns it into something your guests can actually hold and feel, building real excitement.
Your First Glimpse into the Perfect Wedding Day
Long before the music starts or you walk down the aisle, your invitation lands in a mailbox. Its job is huge: it has to communicate the entire vibe of your wedding. Is it a formal, black-tie affair? A laid-back party in a barn? Or a chic, modern celebration? The right printing choices—the paper, the ink, the texture—tell that story instantly.
In a world full of emails and text messages, getting something beautiful in the mail really stands out. The weight of the cardstock, the deep impression of a letterpress design, or the elegant shimmer of gold foil are all things you just can't get from a screen. It's a tactile experience that makes your guests feel special and genuinely excited for your big day.
Why Quality Printing Matters
Opting for professional printing is about more than just looking good; it's about getting every single detail right. Here’s what a high-quality print really does for you:
- Sets the Tone: It clues guests into the formality and style, helping them know what to expect and what to wear.
- Communicates Clearly: Sharp, easy-to-read text on beautiful paper ensures nobody misses the date, time, or location.
- Creates a Lasting Keepsake: Let's be honest, you and your closest family will probably save an invitation forever. Professional printing makes sure it’s a memento worth keeping.
A well-printed invitation doesn't just inform; it delights. It turns a logistical necessity into a cherished part of the wedding story, creating a little moment of joy for everyone who receives it.
The Enduring Power of a Physical Invitation
Even with all the digital options out there, the classic paper invitation isn't going anywhere. In fact, the global market for wedding invitation printing was valued at US$4,013 million in 2024 and is only expected to grow. You can dig into the market growth insights on reports.valuates.com if you're curious, but the takeaway is clear: couples still value the unique impact of a physical invitation.
This guide is here to walk you through all the choices ahead. We'll cover everything from the different printing methods like letterpress and digital to picking out the perfect paper that feels just right. By the time we're done, you'll know exactly how to create an invitation that’s not only beautiful but a true reflection of your love story.
Choosing Your Wedding Invitation Printing Method
This is where the magic starts. Your printing method is what transforms a design on a screen into a beautiful, tangible object that your guests will hold in their hands. It’s about so much more than just putting ink on paper; it's about choosing the texture, the feel, and the personality that will give your guests the very first glimpse of your wedding day.
Think of it like this: your printing method sets the entire mood. It directs the eye, conveys a feeling, and pulls all the creative pieces together. Let's walk through the most popular options to find the perfect one for your story.
The Modern Choice: Digital Printing
Digital printing is easily the most popular and flexible method out there today. Imagine it as a super-powered, professional-grade version of a high-end desktop printer. It works by applying ink directly onto the surface of the paper, giving you crisp, flat text and vibrant, full-color images.
This technique is a creative's dream. It’s the perfect choice if you want to feature a beautiful engagement photo, a custom watercolor illustration, or a design packed with lots of different colors. Because the setup is so straightforward compared to older methods, digital printing is also the fastest and most budget-friendly option. It’s a lifesaver for couples with tight timelines or those who want to make a big impact without breaking the bank.
The Timeless Impression: Letterpress
Letterpress is a true art form, a centuries-old craft that just screams elegance. Instead of ink sitting on top of the paper, a custom-made plate presses the design into the paper, leaving a stunning, touchable indentation. It’s like a beautifully sophisticated stamp.
This method truly shines on thick, soft papers like cotton, which can hold that deep impression perfectly. While letterpress is usually limited to one or two ink colors, the result is undeniably luxurious. It’s a fantastic fit for formal, traditional, or even minimalist weddings where the focus is on impeccable quality and texture.
This decision tree can help you match your vision—from tone and detail to keepsake quality—with the right printing method.
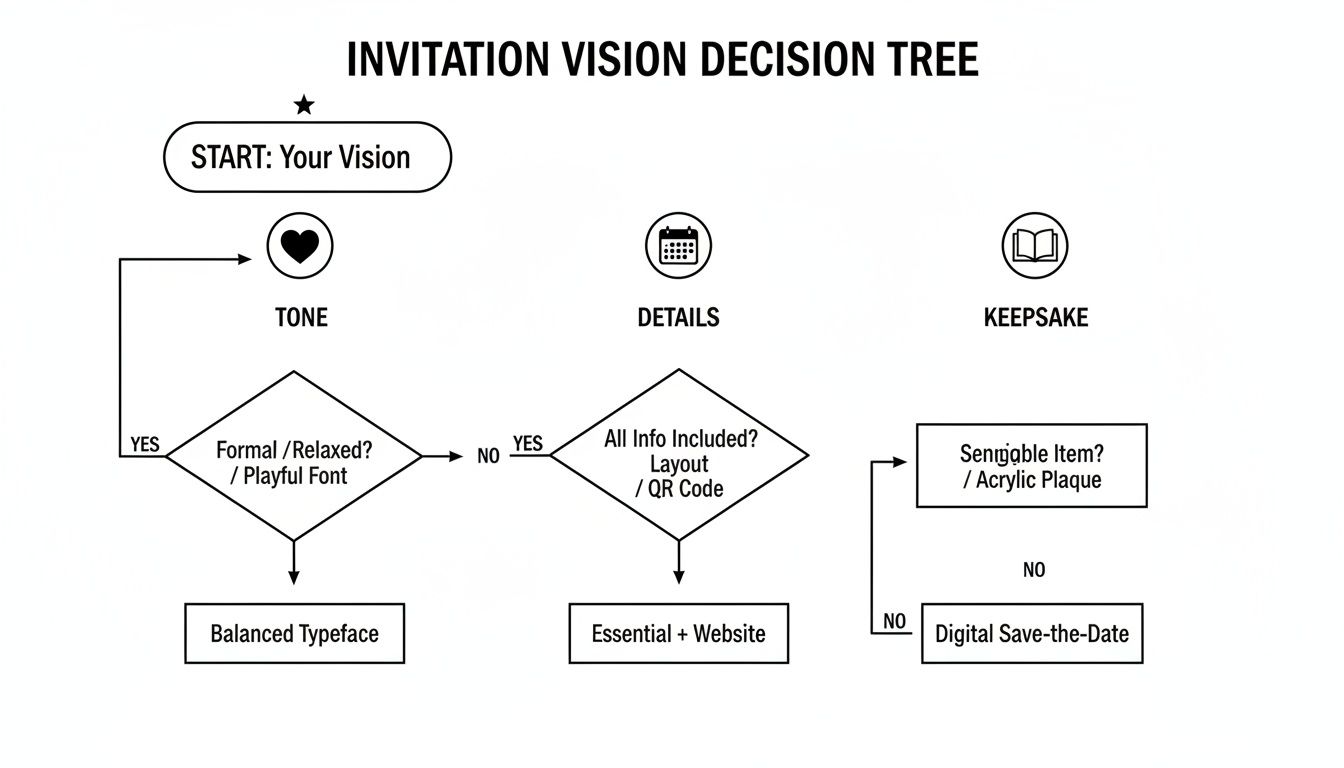
As you can see, your core priorities really guide the best choice for bringing your stationery to life.
The Raised Elegance: Thermography
Want a touch of formal flair without the premium price tag of old-school engraving? Meet thermography. This clever process starts with wet ink, which is then dusted with a special resinous powder. When heated, the ink and powder fuse together and rise, creating a raised, glossy finish you can feel.
It gives your invitations a subtle, three-dimensional effect that feels incredibly refined. Thermography is a fantastic middle-ground for couples who love a classic, formal look but need a more accessible price point.
The Luxurious Shine: Foil Stamping
For pure, unapologetic glamour, nothing beats foil stamping. This technique uses a heated die to press a thin, metallic sheet onto the paper. The result is a brilliant, reflective finish that catches the light and instantly elevates your design.
Gold and silver are the go-to classics, but the world of foil is vast—think rose gold, copper, and even holographic finishes. Foil is often combined with other methods, like digital or letterpress, to make names, dates, or monograms pop. It's the perfect way to add that "wow" factor for a modern, glam, or Art Deco-inspired wedding.
Pro Tip: Don't be afraid to mix and match! Many print shops can combine methods, such as digital printing for a photo on the back and letterpress for the text on the front. This allows you to get the best of both worlds.
To help you get a clearer picture, here’s a quick rundown of how these methods stack up.
Comparing Wedding Invitation Printing Methods
This table offers a quick comparison of the most popular printing techniques to help you choose the best fit for your wedding style and budget.
| Printing Method | Best For | Look & Feel | Typical Cost |
|---|
| Digital | Photos, colorful designs, tight budgets | Flat, smooth ink; crisp, clean lines | $ |
| Letterpress | Formal, traditional, or minimalist events | Deep, tactile impression; luxurious, handcrafted | $$$ |
| Thermography | Classic, formal style on a moderate budget | Raised, glossy text; mimics engraving | $$ |
| Foil Stamping | Glamorous, modern, or Art Deco themes | Shiny, metallic, reflective finish; high-impact | $$$ |
Ultimately, the best choice depends on your vision, your priorities, and what feels right for you and your partner.
The cost of wedding invitations can vary wildly based on these choices. On average, couples spend between $300 and $600 on their invitation suites. To put it in perspective, an order of 100 digital print suites might run $500 to $800, while the same quantity using letterpress can easily start at $1,500. You can see a detailed breakdown of real couple spending habits at withjoy.com.
Understanding these differences is the first step toward making a choice you'll be thrilled with—one that perfectly aligns with both your style and your budget.
2. Selecting the Perfect Paper and Finish
Picking your printing method is just one piece of the puzzle. The other, equally crucial piece is the paper itself—the canvas where your design truly comes to life. The paper stock you choose is the first thing your guests will touch, setting an immediate and powerful tone for your entire event.
Think of paper weight like the thread count in luxury sheets. A higher weight, measured in pounds (lb) or grams per square meter (GSM), means a thicker, more substantial card. For reference, standard office paper is a flimsy 20 lb, but a quality wedding invitation usually starts at 100 lb and can go up to 200 lb or more for a truly luxurious feel.
That thickness isn't just for show. A heavy cardstock feels important in your guests' hands, signaling that this isn't just another piece of mail—it's an invitation to a significant, thoughtfully planned celebration.
Common Paper Textures to Consider
Beyond its weight, the paper's texture adds another layer of personality. Different textures don't just look distinct; they feel different, which helps tie the invitation directly to your wedding's vibe.
- Smooth/Matte: This is your classic, all-around player. It has a clean, non-reflective surface that’s perfect for modern, minimalist designs. Photos and crisp digital printing look absolutely fantastic on it.
- Cotton: Often considered the pinnacle for high-end invitations, cotton paper is soft, pillowy, and has a rich, fabric-like feel. It’s the perfect dance partner for letterpress, as it takes a deep, gorgeous impression.
- Linen: With its subtle, crosshatch pattern mimicking fine linen fabric, this paper stock whispers elegance and sophistication. It's a wonderful choice for more traditional or formal weddings.
- Felt: This paper has a slightly soft, almost fuzzy texture that feels warm and artisanal. It adds a lovely depth that’s perfect for rustic, bohemian, or vintage-inspired themes.
Each of these textures interacts with ink and light in its own unique way, so your choice will directly shape the final look of your design.
The goal is to create a cohesive sensory experience. A rustic barn wedding might feel right on felted paper, while a glamorous ballroom affair could call for a smooth stock with a pearlescent finish.
Matching Paper to Your Printing Method
The relationship between your paper and printing method is key to getting a flawless result. Some papers are practically made for certain techniques, and getting the pairing right will elevate your invitations from nice to absolutely unforgettable.
For instance, the deep, tactile impression of letterpress printing is most dramatic on a thick, soft paper like 100% cotton. The paper’s soft fibers give way under the press, creating a much richer, more defined "bite" than a stiffer cardstock ever could.
On the other hand, if you're using digital printing for vibrant photos or detailed illustrations, a smooth matte stock is your best bet. Its non-porous surface lets the ink sit crisply right on top, producing sharp lines and true-to-life colors without any of it sinking in or looking muddy.
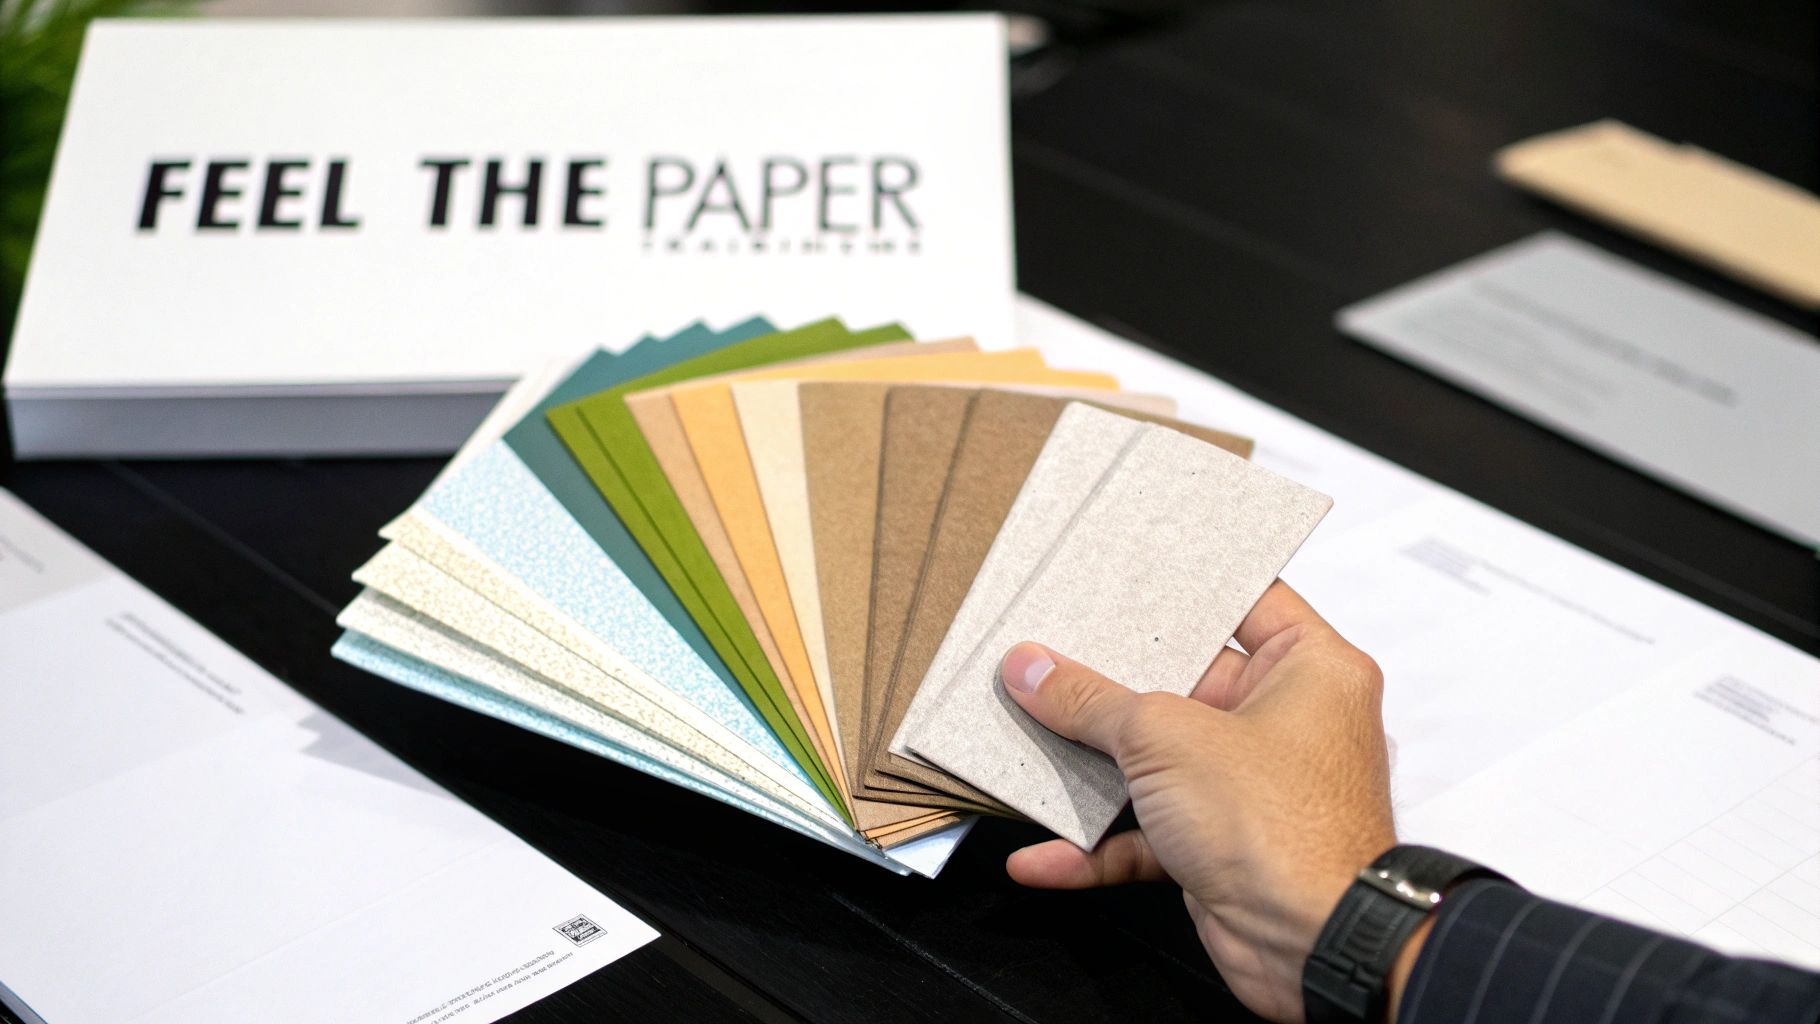
Why You Should Always Get a Paper Sample
Reading about textures and weights is one thing, but there's no substitute for actually holding the paper in your hands. This is why asking your printer for a paper sample kit is a non-negotiable step in the process. It's the only way to be sure.
Holding a sample allows you to:
- Feel the quality: You can directly compare the sturdiness of a 110 lb card versus a 130 lb one.
- See the true color: A computer screen can't accurately show the difference between a warm ivory and a bright white.
- Experience the texture: Is the linen finish too subtle? Is the felt too rustic? You'll know instantly.
- Test it with light: See how a pearlescent or metallic finish really shimmers in a way a digital proof never can.
Most professional print shops, like Camelot Print & Copy Centers, are more than happy to provide samples. This simple step removes all the guesswork and ensures the final product you receive is exactly what you envisioned for your special day.
Preparing Your Design for a Flawless Print
Getting your beautiful design from a glowing computer screen onto a physical piece of paper can feel a bit technical. But don't let the jargon intimidate you. Nailing the file setup is all about following a few key rules to make sure what you see on screen is exactly what you get in your hands.
Think of your design file as a detailed blueprint you’re handing over to a builder—in this case, your printer. A clear, precise blueprint leads to a perfect final product. A little prep work now will save you from major headaches and costly reprints down the road.
Setting Up Correct File Dimensions and Bleed
First things first: get the size right. Before you even begin designing, you need to know the final dimensions of your invitation. But it’s not just about the trim size; you also have to account for something called bleed.
Bleed is basically a safety margin. It’s an extra 1/8th of an inch (or 0.125 inches) of your background design that extends past the final cut lines. If you have any colors, photos, or patterns that you want to go all the way to the edge of the paper, they must stretch into this bleed area.
So, why is this a big deal? Printers print your invitations on massive sheets of paper and then trim them down. Paper can shift ever so slightly during cutting. Without that bleed, any tiny misalignment could leave an ugly white sliver along the edge of your finished invitation. It’s a small step that makes a world of difference.
Image Resolution and Color Profiles
This one is non-negotiable for professional-quality printing. For your photos and text to look sharp and crisp—not fuzzy or pixelated—your files need a resolution of at least 300 DPI (dots per inch). Most images you grab from a website or social media are only 72 DPI, which looks fine on a screen but will come out looking blurry and cheap on paper.
Just as important is the color mode. Your computer screen uses the RGB (Red, Green, Blue) color model, which is based on light. But professional printers use ink, which works on the CMYK (Cyan, Magenta, Yellow, Black) model.
To make sure that stunning navy blue on your screen doesn't print as a surprising royal purple, your design files have to be converted to the CMYK color profile. This simple switch is the key to getting the most accurate color possible.
Outlining Fonts and Final File Formats
Ever open a document on a different computer and see all the fonts go haywire? That happens when the new machine doesn’t have those specific fonts installed. To prevent this catastrophe with your invitations, you need to outline your fonts.
This process essentially turns your text from editable letters into fixed shapes, almost like an image. The printer no longer needs to have your specific font file because the text is now locked in. It’s a critical step to ensure your typography looks exactly how you designed it.
Once your design is perfect, export the final version as a high-quality PDF. This is the gold standard for printers because it packages everything—images, fonts, and settings—into a single, reliable file that just works.
The Critical Importance of Proofing
Before the printer runs your full order of 100 or more invitations, you’ll get a proof. This is it. This is your final chance to catch any and every mistake before it’s too late.
What to Check on Your Proof:
- Spelling and Grammar: Read every single word out loud. Double- and triple-check all names, dates, times, and addresses.
- Layout and Spacing: Make sure everything is aligned properly. Are there any weird gaps or crowded lines of text?
- Color Accuracy: If you received a physical proof, do the colors look right? Remember that digital proofs are mainly for checking layout, not for perfect color matching.
- Overall Details: Is everything there? Does it all look exactly as you envisioned it?
Approving the proof is your official sign-off. Take your time with it. Get a second or even a third pair of eyes to look it over. Only give your printer the green light when you are 100% confident it’s perfect.
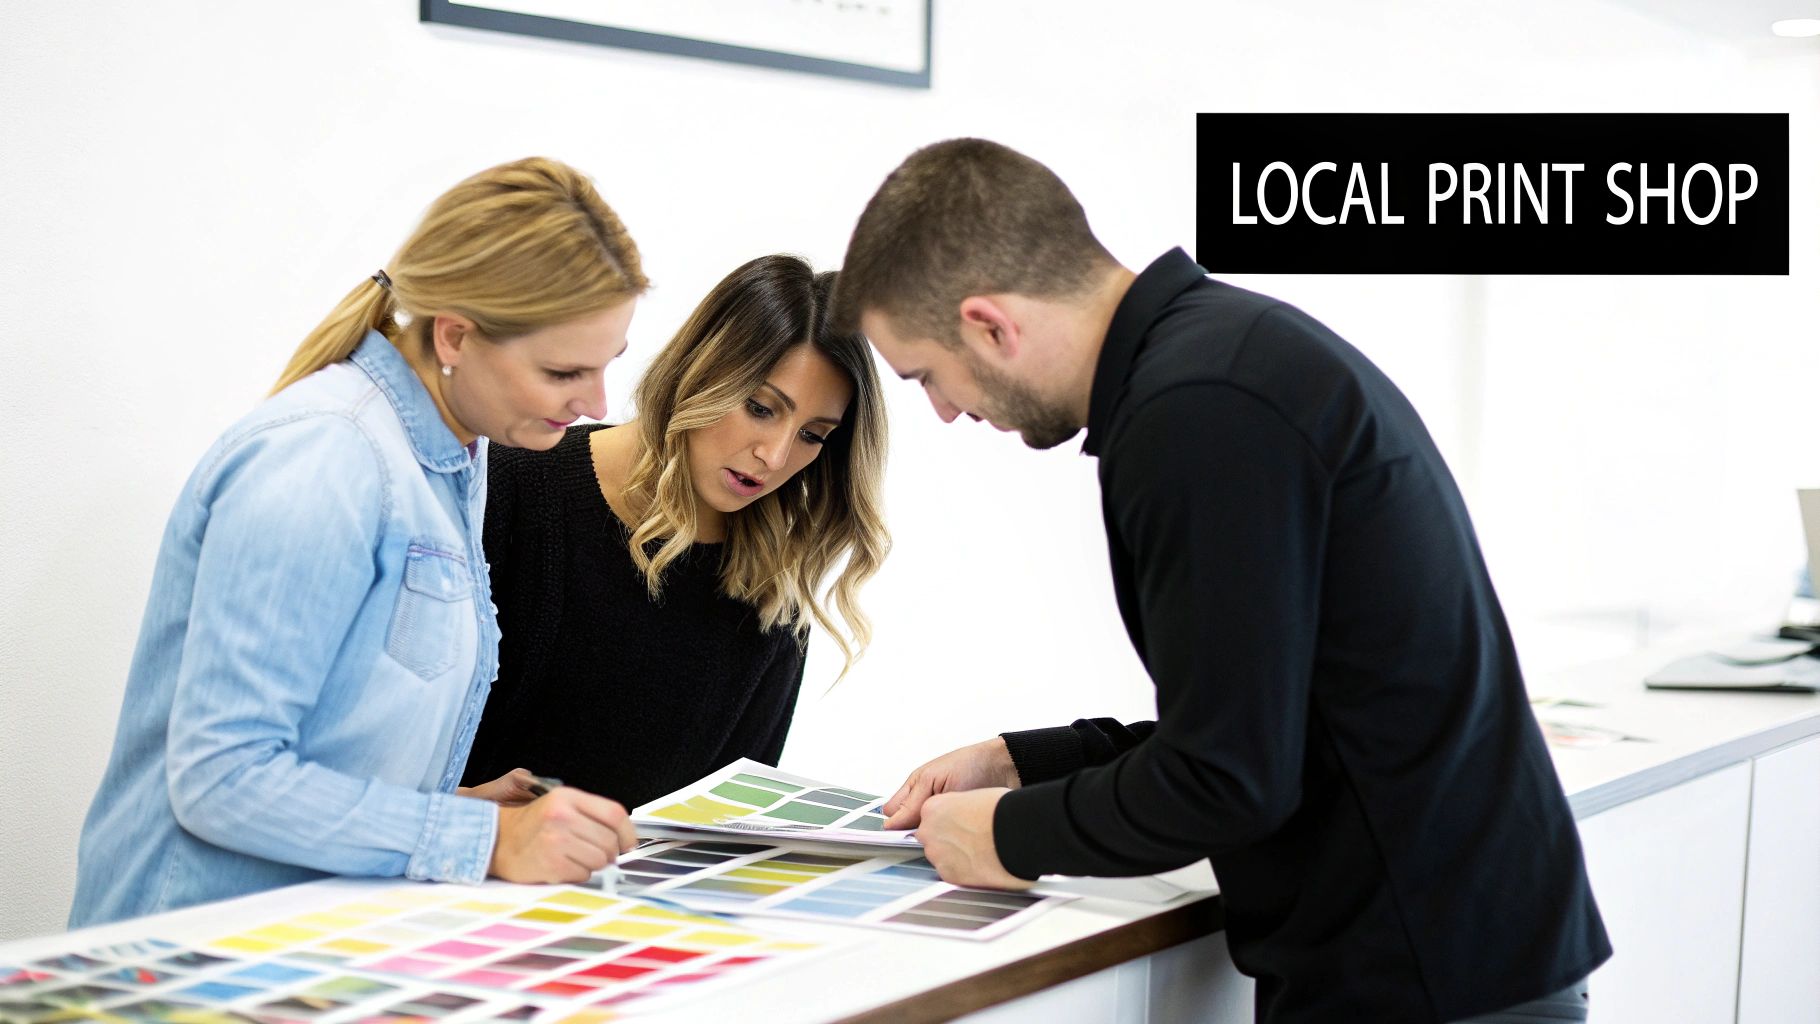
Working with a Local Print Shop
In a world full of click-to-buy options, there’s something special about going local for your wedding invitations. Choosing a neighborhood print shop isn't just a transaction; it's a partnership. This hands-on, face-to-face approach gives you a kind of quality control and peace of mind that you just can't get from a website.
The biggest perk? You get to see and touch everything before you commit. You can run your fingers over the texture of a linen stock, feel the difference between a smooth matte finish and a hefty cotton paper, and see how the ink color really looks under the light. It's a tactile experience that guarantees the final product is exactly what you were dreaming of—no nasty surprises when the box arrives.
The Value of Local Expertise
Think of your local printer as more than just a vendor—they're your expert guide. Their team has seen it all and can offer practical advice that fits your specific design, timeline, and budget. They're also an invaluable second set of eyes, catching potential problems like low-resolution images or funky color profiles that could derail your project.
This is where their experience really shines. A skilled local printer can:
- Suggest savvy alternatives to get you that high-end look for less.
- Recommend the perfect paper that makes your chosen printing method pop.
- Offer guidance on tricky details like sizing, wording, and which envelopes will work best.
That kind of expertise is a lifesaver for something as important as your wedding invitations. It's why so many couples still prefer to work with someone in person. In fact, offline booking for wedding services is holding strong, with a projected growth of 6.5% CAGR between 2025 and 2030 as couples seek out genuine, tangible interactions. You can read more about this trend in the U.S. wedding services market report.
Choosing a local printer means you're investing in accountability. When you can look someone in the eye, you build a relationship based on trust. You know they're committed to getting your vision right, from the first proof to the final product.
Building a Relationship for a Smoother Process
When you go local, you’re not just an order number in a queue—you're a real person. This relationship makes everything smoother, more flexible, and a whole lot less stressful. Need to make a last-minute change? You can just pick up the phone or drop by the shop. No endless email chains or frustrating customer service bots.
This direct line of communication simplifies the entire printing journey:
- The First Chat: You'll sit down, talk through your vision, flip through physical samples, and get a clear, accurate quote.
- Sending Your Files: They'll give you instant feedback, letting you know if your files are good to go and helping you fix any issues on the spot.
- The Proofing: You'll get to hold a physical proof in your hands. This is your chance to approve colors, check spelling, and sign off with total confidence.
- The Final Pickup: You can pick up your finished invitations knowing they’ve been personally inspected by a team you trust.
Working with a local shop takes the guesswork and anxiety out of one of the most detail-oriented parts of wedding planning. It lets you relax and focus on what really matters—celebrating your big day.
Have Questions? We Have Answers.
Walking into the world of wedding printing can feel a little overwhelming, but it doesn't have to be. Getting the right information upfront makes the whole process a breeze. Let's clear up some of the most common questions we hear from couples just like you.
How Far in Advance Should I Order My Invitations?
This is probably the most crucial question, and the answer is all about building in a stress-free buffer. We always recommend ordering your wedding invitations 4-5 months before your wedding date. This isn't just about printing time; it gives you plenty of room for design edits, proofing, assembly, and addressing without any last-minute panic.
Once you have them in hand, your mailing timeline should be:
- 6-8 weeks before the big day for a local wedding.
- 10-12 weeks out for a destination wedding, giving guests ample time to book flights and hotels.
Can I Just Print My Invitations at Home?
I get it—it sounds like an easy way to trim the budget. But honestly, for your main invitations, this is one corner you don't want to cut. Home printers just aren't built for the job. They can't handle the thick, beautiful cardstocks that make an invitation feel special, and they struggle to print all the way to the edge (what we call a "full bleed"), leaving an unprofessional-looking white border.
Think of it this way: your invitation is the very first glimpse your guests will have of your wedding day. Professional printing ensures the colors are rich, the text is razor-sharp, and the quality of the final piece truly sets the tone. It's an investment in that first impression.
What’s a Print Proof, and Why Do I Need to Check It So Carefully?
A proof is your final, last-chance-to-catch-it preview of your invitation before we print the entire run. It is, without a doubt, the most important step in the entire process. This is your moment to put on your detective hat and meticulously check for absolutely everything.
Look for things like:
- Pesky typos or grammar mistakes.
- Incorrect dates, times, or venue addresses.
- Anything off with the layout, spacing, or alignment.
- Color that doesn't look quite right (this is especially important with a physical proof).
When you sign off on that proof, you’re giving the green light. Taking an extra ten minutes here can save you from a huge headache later.
Ready to create invitations that feel as special as your big day? The team at Camelot Print & Copy Centers has been helping couples with this for years, offering personal guidance and a commitment to quality. Learn more and get started today at camelotprintandcopy.us.